All Secrets in the First Sea of Blox Fruits
Lots of secrets to uncover!

Tell us about your article reading experience.
- No
- Sort of
- Yes
With the massive rework of Blox Fruits' First Sea, a ton of new secrets were added to almost every island. Discovering and completing these hidden quests will help you push past the current level cap in the game, so even high level players will find themselves coming back to the First Sea.
In this guide, we will go over every secret in all of the First Sea islands so you can complete them quickly.
Before we begin, it's worth noting that every set of secrets is tied to a quest NPC on each island that has them. We'll let you know who and where they are as we cover each island.
IMPORTANT: Some of these secrets can only spawn while a player is on the island, and some can only be completed by one person each time it spawns.
Full Sea 1 Map and How to Navigate It
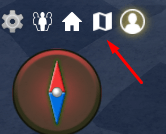
The map can be viewed by clicking the map icon on the left part of the screen, beside the Home teleport button:
From here, you'll find a map of the entire First Sea. To help you navigate to your desired destination, click on the island you want to go to and then press the Navigate button on the lower right corner.
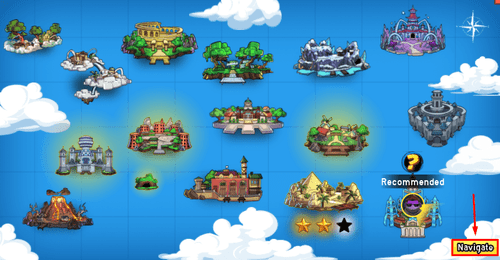
This will highlight the island on your map, as well as show you the distance from your current location.
Jungle Secrets
The main NPC for these secrets is the Adventurer at the middle of the island, where all the rope bridges are.
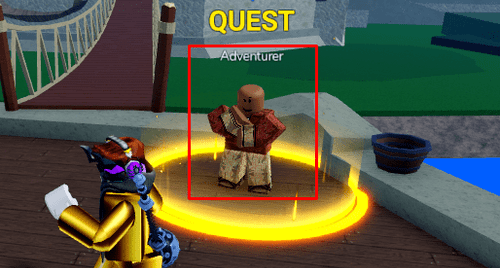
Secret #1 - The Thief
At some point, you may notice a set of footprints leading into any of the trees on the island.
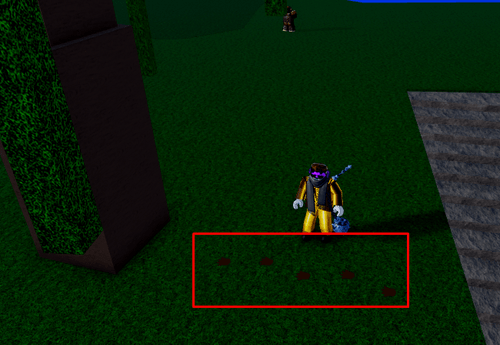
Attack the tree beside the footprints to spawn a Thieving Monkey. Kill it and pick up the Adventurer's Hat that it drops. Bring the hat to the Adventurer and you're done!
Secret #2 - The Grappling Hook
Head to the part of Jungle Island where the Gorilla Boss spawns. Under the large tree where the treehouse is built, you'll find a Grappling Hook on the ground.
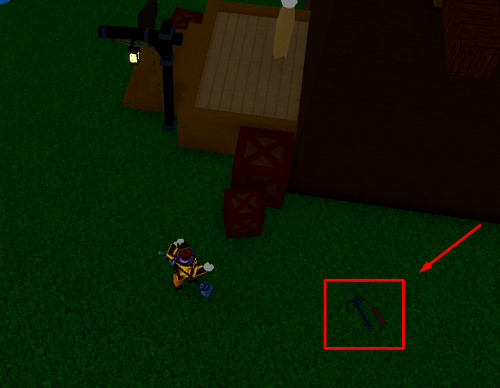
Pick it up and you'll see a message that it may be useful for something on the island. Climb up the treehouse right beside where you picked it up.
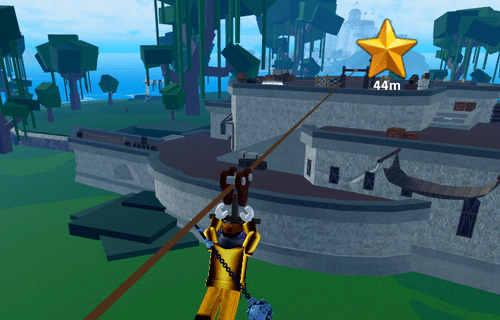
Walk up to the wooden arch at the edge, then hold M1 while holding the Grappling Hook. Aim the red trajectory line at the arch on the other side of the Jungle island, right on the building.
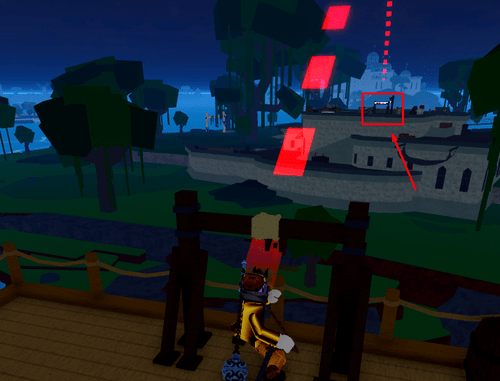
If you aimed correctly, you'll create a zipline that you can ride to get back onto the main part of the island, where you can conveniently turn in the secret quest at the Adventurer.
Secret #3 - Awakened Gorilla Boss
Whenever the Gorilla boss awakens, you'll see a message at the top of your screen saying: "The jungle has gone quiet. Something in the canopy is awake. The Gorilla King is stirring in the jungle..."
When this happens, head to where the Gorilla King spawns and start punching the large tree near the dock:
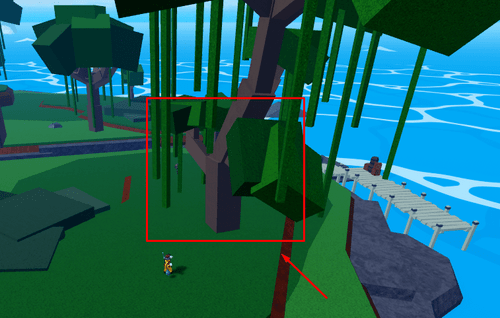
This will cause some bananas to fall down, which angers the Gorilla King. He's a low level boss, but do not underestimate him as even a max level player can struggle a bit if soloing him.
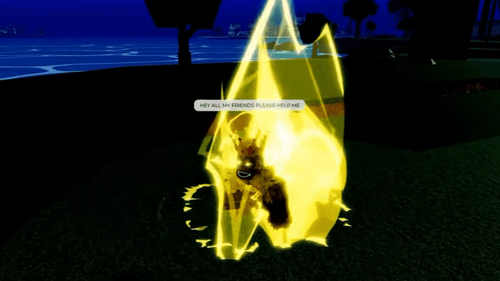
After defeating the boss, you can claim your free levels from the Adventurer.
Pirate Village Secrets
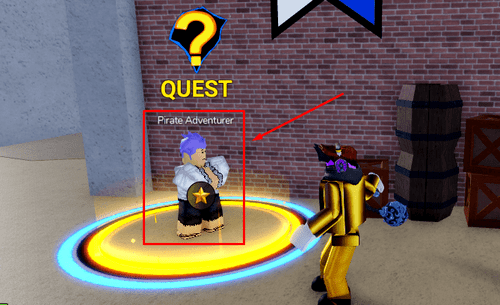
For the Pirate Village, the Pirate Adventurer NPC in front of the docks will be your main source of freebies here.
Secret #1 - Free the Windmill
The first secret on the Pirate Village island involves the windmill in the middle of the town. As you approach it, a brief cutscene will start, and your character will claim that you can probably cut the ropes preventing it from spinning.
You must have any sword equipped for this quest. There's a conveniently placed sword dealer under the windmill if you somehow don't have one yet.
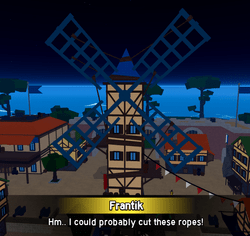
You simply need to cut the five ropes all around the windmill's blue blades by using your sword's M1 attack on them. Once you're done, the windmill will start spinning again. You can then claim your free levels at the Pirate Adventurer.
Secret #2 - Tavern Brawl
At some point, you'll see a red message on your chat saying: "Trouble has broken out at the tavern!"
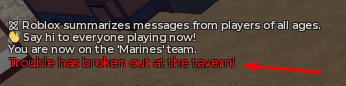
When this happens, rush to the first floor of the building where the Chef boss spawns. This will trigger a cutscene, and you must click "Breach Door" once given the option to do so.
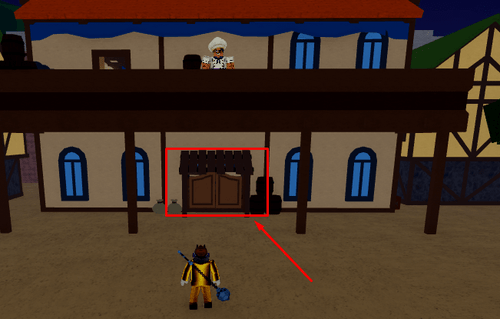
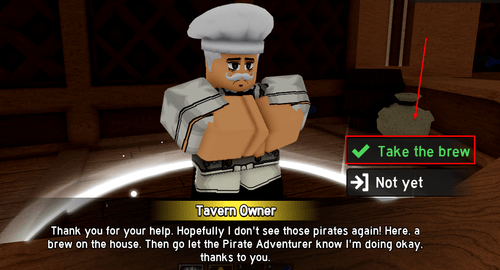
After the cutscene, you must defeat a group of three Tavern Pirates. When they have all been defeated, return to the tavern owner, who will be waiting behind the bar. A short cutscene will play as he thanks you for your efforts.
Once given the option to do so, click "Take the brew" to get your reward and head back to the Pirate Adventurer to claim your free levels.
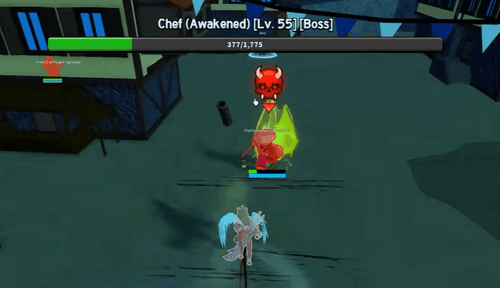
Secret #3 - Awakened Chef Boss
When the Chef boss awakens, you'll see a message at the top of your screen saying: "The kitchen has gone quiet. Something is being prepared. A curious smell is brewing from the Chef's kitchen at Pirate Village."
After that happens, go to the second floor of the tavern, which is the room directly behind the Chef's spawn location. Walk up to the cauldron and insert the two items it asks for.
The ingredients are different for every player!
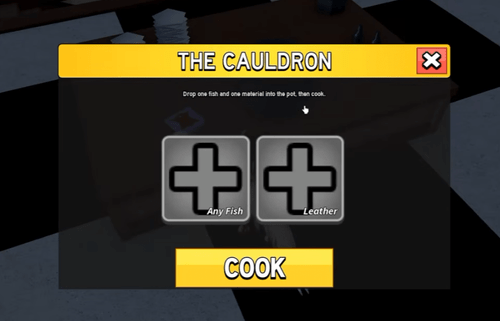
Once you insert all the necessary items, press the Cook button to awaken the Chef. Defeat him to get your free levels from the Pirate Adventurer.
Desert Secrets
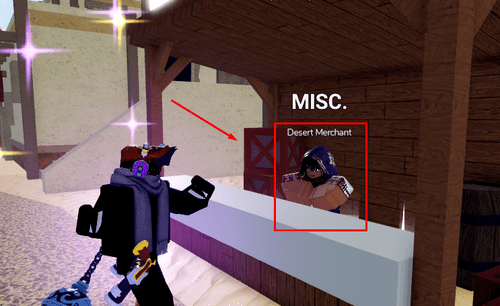
On the Desert island, the Desert Merchant near the bandits is the NPC you'll go to if you want to turn in the first and third secret quests (Saving Hasan & Prickly Harvest).
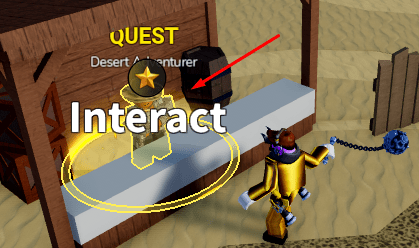
For the second one (Cleaning the Runes), you must return to the Desert Adventurer near the docks. Either way, you will have a star icon guiding you to the correct NPC.
Secret #1 - Saving Hasan
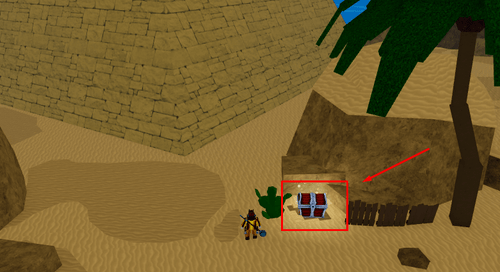
Near the pyramid on the island is a silver chest with a secret entrance under it. Enter the hole under the chest and follow the cave until you reach a ladder.
As you approach the end of the cave with the ladder, a cutscene will play wherein an NPC named Hasan is being attacked by skeletons. Climb up the ladder and kill the skeletons to save him.
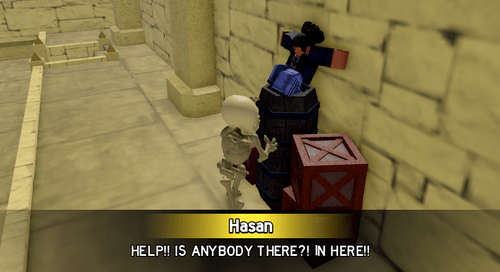
After killing 4 skeletons in total, speak with Hasan and return to the Desert Merchant to claim your rewards.
Secret #2 - Cleaning the Runes
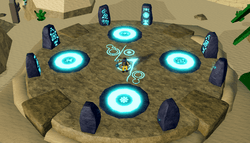
Head to the pyramid once more. Beside it is a set of stones that form a circular shape, but each of them is covered by a mound of sand.
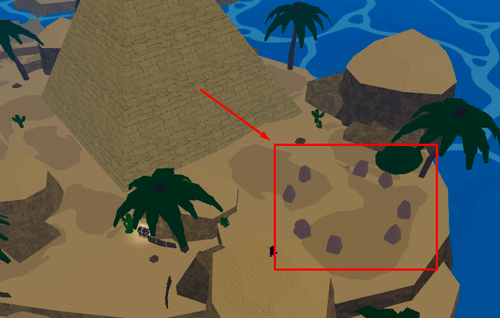
Use either your sword or melee M1 to clean up the stones. It will take roughly three hits to clean each stone regardless of your level or mastery.
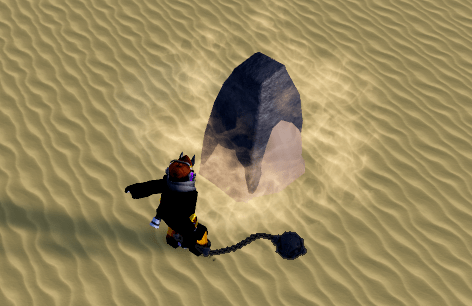
Once you're done, all of the stones will start glowing blue, revealing a lot of strange runes all around them. After a few seconds, a platform will raise, and your character will make a few remarks.
You can now proceed to the Desert Adventurer to claim your rewards.
Secret #3 - Prickly Harvest
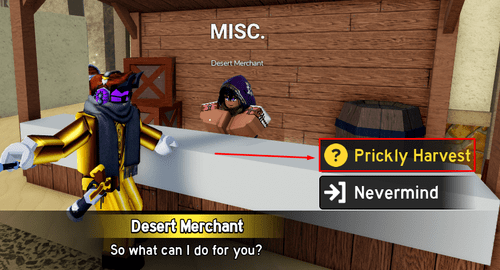
Speak with the Desert Merchant and select the Prickly Harvest dialogue option. If the cacti are ready, which can happen at any moment, you will be tasked with gathering Cactus Petals on the island.
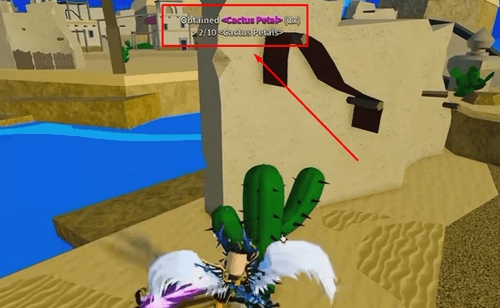
Once you've started the quest, hit any of the cacti found on Desert Island until you find one that shakes. For those that shake, you can continue hitting it until you see a message saying Obtained <Cactus Petal> (1x).
Repeat this process on other cacti until you have a total of 10 Cactus Petals, then return to the merchant for your reward.
Frozen Village Secrets
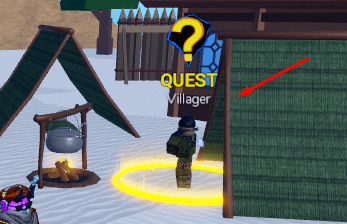
On the Frozen Village island, you can turn in your secret quests at the Villager by the green tents.
Secret #1 - Snowballs
When you see a message saying "It begins to snow heavily over Frozen Village...", mounds of snow will start spawning all around the island. You can touch these to create a giant snowball.
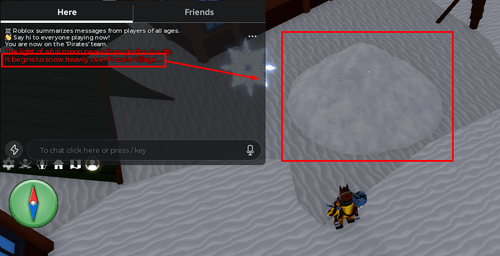
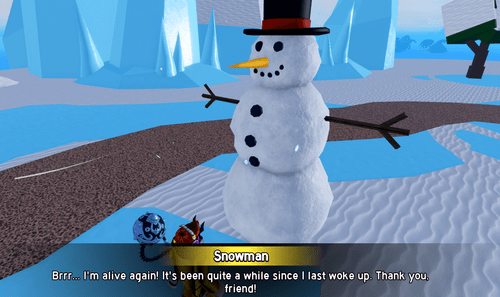
You must push three of these snowballs into one another to form a snowman, who will talk to you after a brief animation. Once you're done, talk to the Villager for your rewards.
Be careful when pushing the snowballs, as they will burst if they fall down even just a small height!
Secret #2 - Breaking the Ice
For this next secret, head to the large cave on the side of the island, where you meet the Ability Teacher.
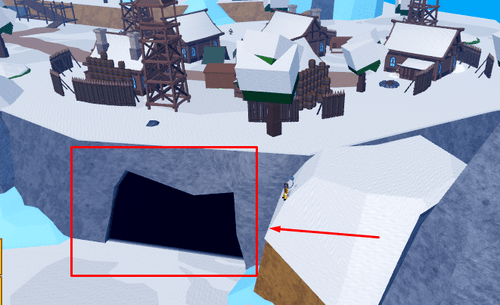
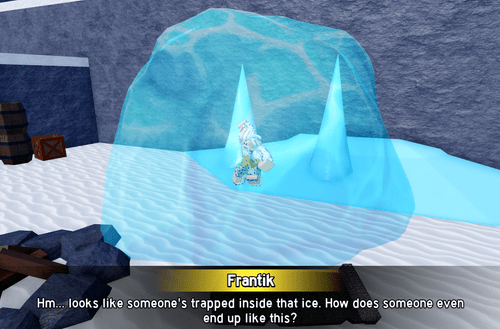
Once inside, you'll notice that there's an NPC frozen in a block of ice. Approach it to start a short cutscene where your character says that you can't leave them in there.
Attack the ice until it breaks, and you'll immediately be rewarded with free levels once the NPC has been freed.
Secret #3 - Awakened Yeti Boss
When the text "The blizzard has stopped. The mountain is holding its breath." appears on the top part of your screen, this means that the Yeti can be awakened.
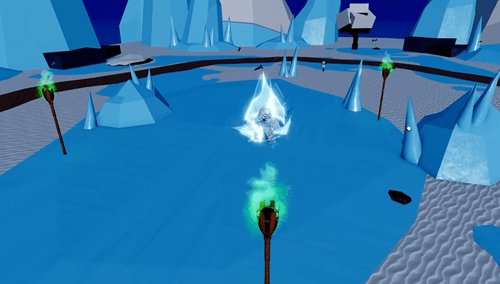
Head to where the Yeti spawns and look for green blocks of ice scattered around the area. Break all three of them.
For each block of ice you break, one of the torches around the Yeti's spawn area will burn with a green flame.
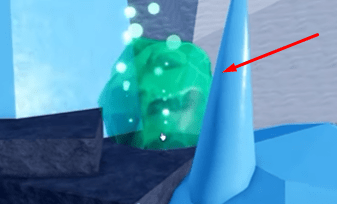
Upon breaking the last block of green ice, a cutscene will play, and the Yeti will now be awakened. Defeat it and claim your rewards at the Villager.
Marine Fortress Secrets
For the Marine Fortress, secret quests are turned in at the Marine NPC near the docks. The only exception is the Flagpole secret, which will also be turned in at the NPC that starts the quest.
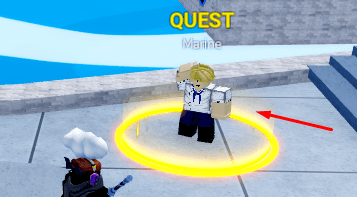
Secret #1 - The Flagpole
At Marine Fortress, go to the tower to the right of the docks. At the top floor, you'll find an NPC named Parlus.
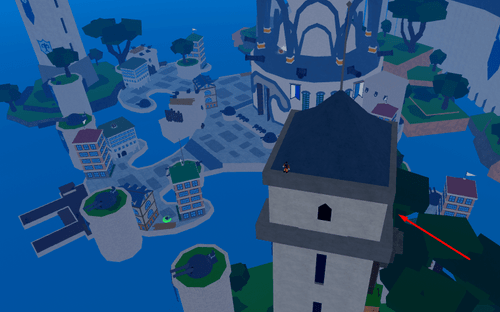
Speak with Parlus and select the "Flagpole" option to start the quest. He'll ask you to look for some sturdy rope for his flag, and you can find it beside a shack just under the opposite tower (left from the docks).
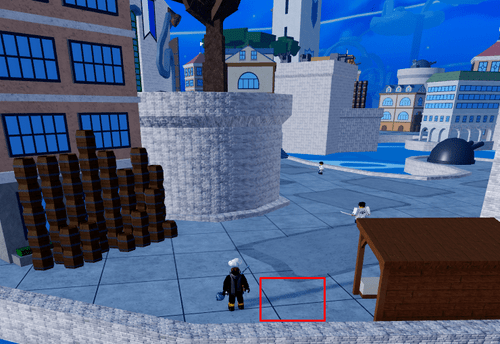
Once you have the rope, head to the flagpole in front of the dock, a few steps away from the Marine NPC.
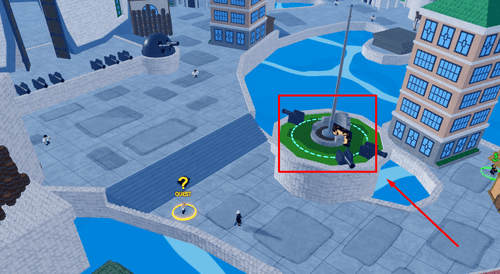
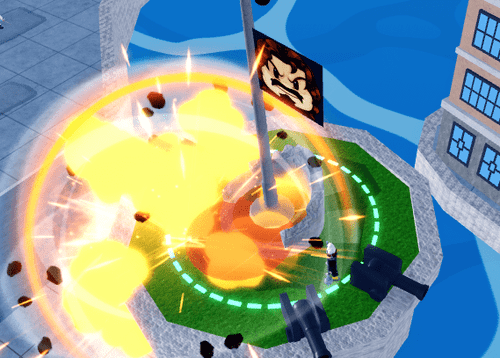
Step inside the circle and stay there until the flag is fully raised. As you wait for the flag to go up, cannons will fire at you and try to knock you out of the circle. Avoid all of the red circles until it's done.
When you are finished, return to Parlus to receive your rewards.
Secret #2 - The Pirate Raid
After a while, you'll see a message saying "Lookouts have spotted pirate sails on the horizon! The fleet will be on the Marine Fortress in 5 minutes!"
All you can do here is wait until they arrive, and more warnings will show up in the chat box as they get closer.

When they arrive, a cutscene will then play in which a fleet of pirate ships approaches the island. You must destroy all of them using the cannons found on the small towers near the docks.
There is one NPC-manned cannon that will help you out too.
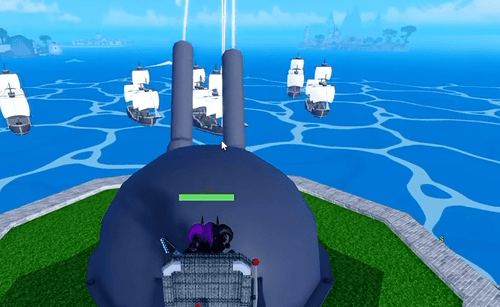
Once you've defeated them all, you'll see a message saying "The Fortress Stands". You can then claim your free levels from the Marine NPC.
Secret #3 - Awakened Vice Admiral Boss
After a while, you'll see a message stating "Military weaponry has been unlocked. An alarm has been sounded at the Marine Fortress!"
When this happens, you have to man the cannons near the docks (the same ones from the pirate raid). You must use these cannons to destroy the three sections of the main building in the fortress, which has the spinning set of cannons.
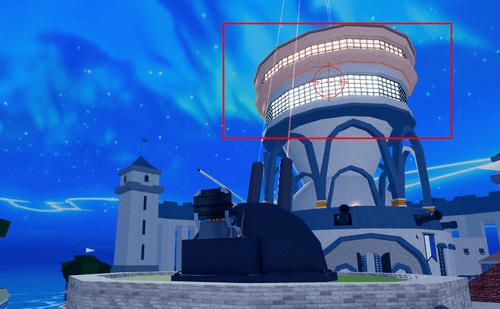
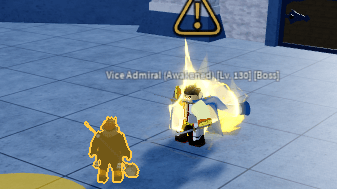
After destroying all parts of the building, a brief cutscene will play. When that's done, the Awakened Vice Admiral will spawn in the main building. Defeat it and claim your rewards at the Marine NPC.
Lower Skylands Secrets
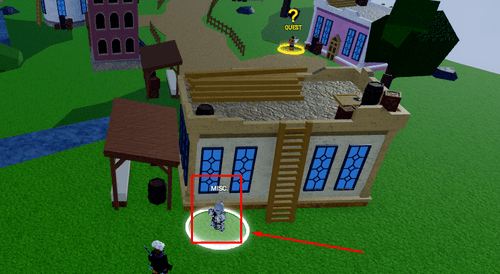
The Lower Skylands secret quest NPC is the Angel Guard found near the Mole quest giver. He's hiding behind a small building in the corner.
Secret #1 - The Mad Scientist's Lightning Bolt
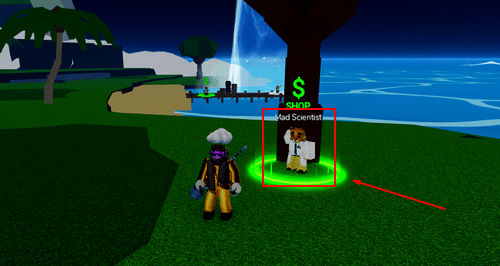
First, from the docks of the Lower Skylands, turn to the left and speak with the Mad Scientist by the tree. Talk to them and they will ask for a Lightning Bolt.
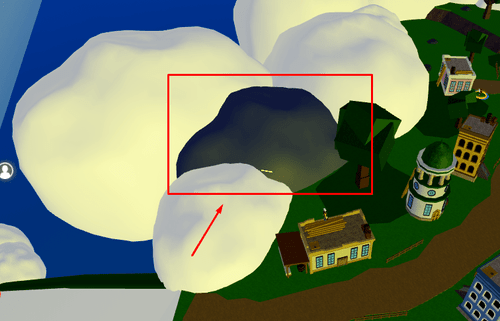
Climb up the segments of the Skylands until you find a cloud that's flickering black with the occasional lightning extending out of it. Attack it until you get a Lightning Bolt.
Secret #2 - A Cloudy Treasure
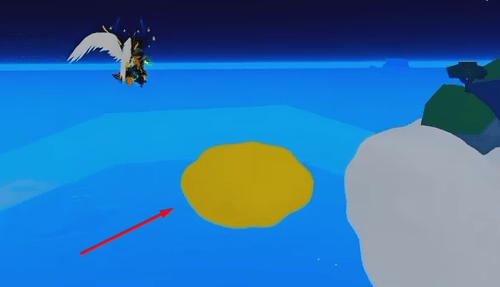
After a while, a message stating "A secret cloud has appeared over the Skylands!" will appear. When this happens, head up to the top of the Skylands and fly or jump up until you spot a gold cloud.
Break it multiple times until it spits out a chest into the lands down below.
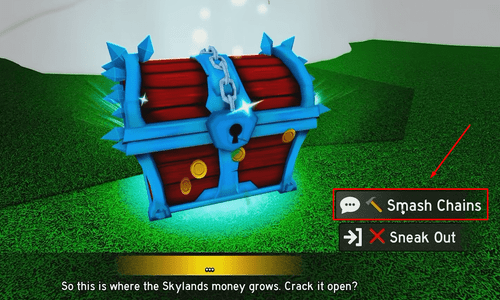
Search for the special chest and approach it to get some dialogue. Press the **Smash Chains** option to start a fight with some bandits.
After killing the bandits, return to the chest to loot it, then claim your free levels at the Angel Guard NPC.
Secret #3 - Invaders in the Castle
After a while, you'll see a message saying "Enemies have invaded the Skylands Castle!" Head to the castle with the blue roof when this shows up. There will be a panel that you can interact with at the back:
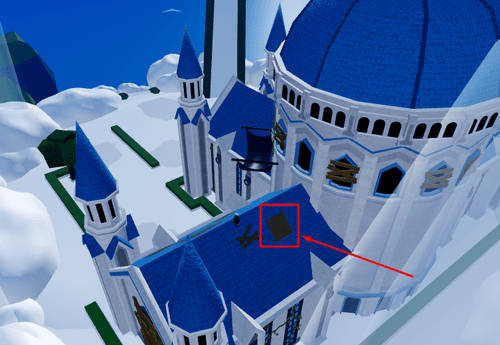
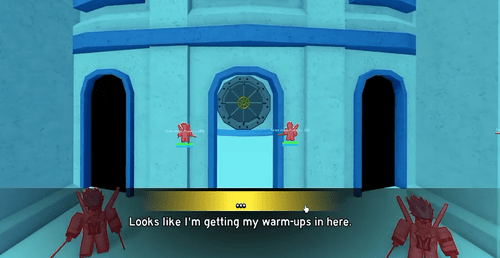
Using the panel will reveal an entrance to the castle. Jump in to trigger a cutscene, then defeat all of the Fallen Angel Pirates inside.
WARNING: This event is on an undisclosed timer. If nobody clears this secret in time, you'll see a message saying "The invaders slipped back out of the castle".
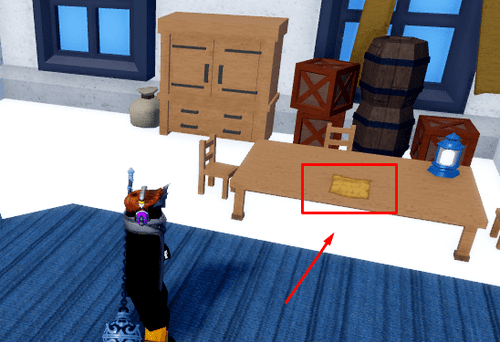
After defeating all of the enemies inside, head to the room to the right of the vault. There will be a Crumpled Letter on the table that will contain the code to the vault.
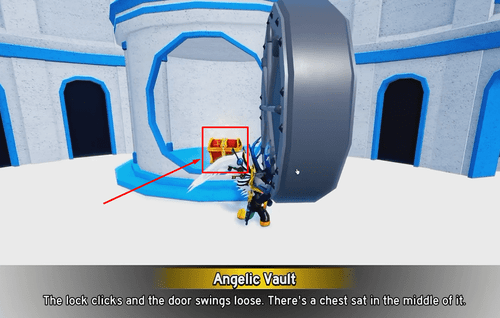
Use the code to open the vault (this is different for every player) and claim the golden chest inside. After picking up the chest, return to the Angel Guard for your free levels.
Upper Skylands Secrets
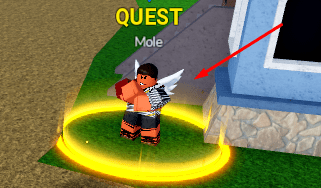
For the Upper Skylands, the main NPC for secrets is Mole, who is found just near the entrance.
Secret #1 - The Old Temple
To start this secret, first head to the Sky Quest Giver 2 NPC, then pick the dialogue option "The old temple".
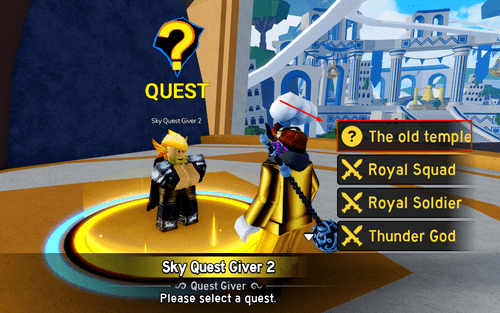
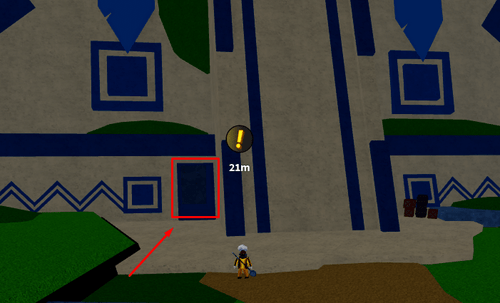
Follow the quest marker into the temple next to where the Thunder God boss spawns. There, you'll find a destructible wall to the left of the stairs. Break in by hitting it a few times.
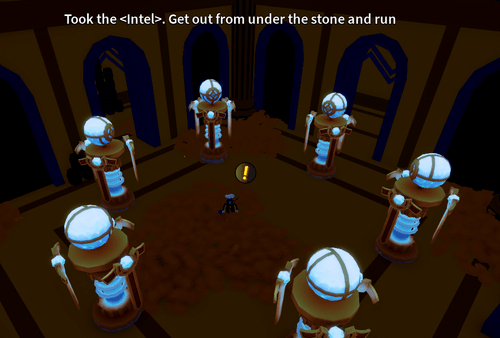
In the hidden temple, there will be a set of towers that you can rotate. Click on each to rotate them until the lines of energy they create form a circle.
Once all lines have been connected, a cutscene will play and the temple will go dark. All that's left to do from this point is to run back to the Sky Quest Giver 2 for your reward.
WARNING: Until you return to the quest giver, lightning will periodically strike your current location, so be quick!
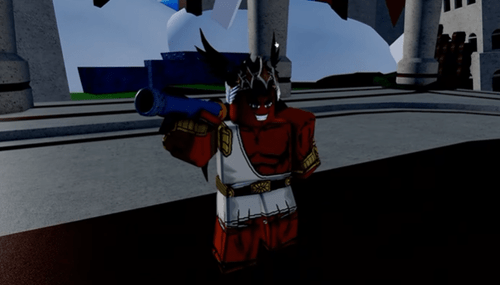
Secret #2 - Awakened Sky Warlord Boss
After a while, you'll see a message saying "A storm brews in the upper skylands..." When this happens, destructible black clouds will show up above the Sky Warlord's spawn location.
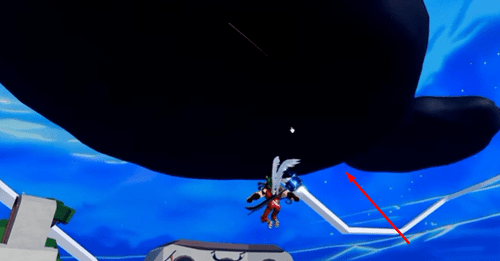
Upon breaking all of the black clouds, the Sky Warlord boss will awaken. Defeat him and return to the Sky Quest Giver 2 for your free levels.
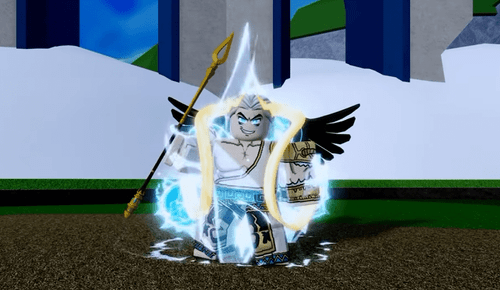
Secret #3 - Awakened Thunder God Boss
When you see the message "The bell shimmers in upper skylands", this means that you can awaken the Thunder God. To do this, go to the bell near the Thunder God's spawn location.
Attack the bell to start a minigame. Icons will start appearing in front of the bell, and you must strike it with the corresponding attack style (gun, melee, or sword) on each icon.
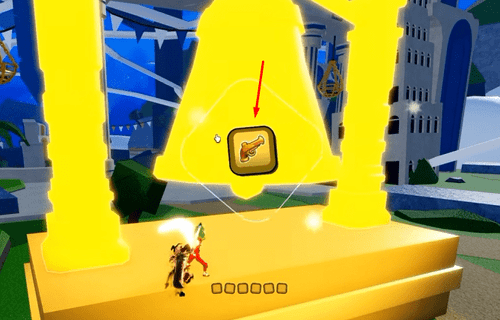
After successfully hitting the bell six times in a row, a cutscene will play, and the Thunder God will be awakened. Kill it and claim your rewards at the Mole NPC.
Prison Secrets
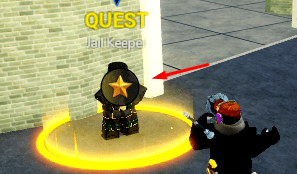
At the Prison, you will have to go to the Jail Keeper NPC to claim your secret rewards.
Secret #1 - Escaping Prisoners
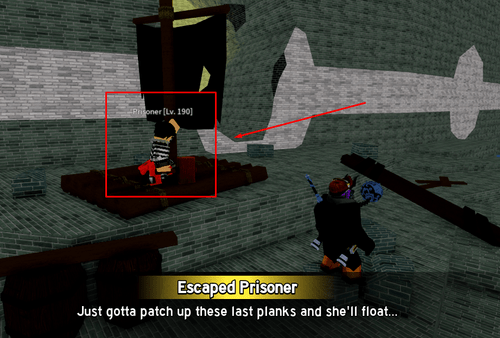
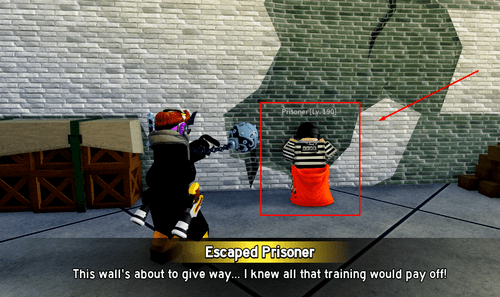
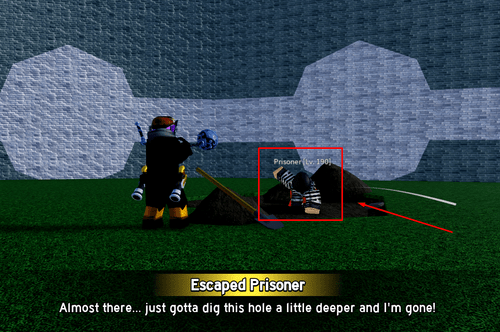
For this first secret, you must find three prisoners that are trying to escape. Confront each prisoner by approaching them, then kill them once they're done talking. They can be found in the following locations:
Instinct will help you find them! Pay attention to any movement, as they have unique idle animations.
Prisoner # | Location | Image |
|---|---|---|
1 | On the side of the Prison's outer wall. He is building a small raft by the ocean. |
|
2 | Near the Warden's spawn point. This one is repeatedly trying to break the wall by running into it. |
|
3 | Near the Head Jailer quest giver. This prisoner is trying to dig into the ground. |
|
Secret #2 - Don Megalo
On the balcony above the Warden's spawn point is a Cell Block Key. Pick it up and proceed into the Prison's central building.
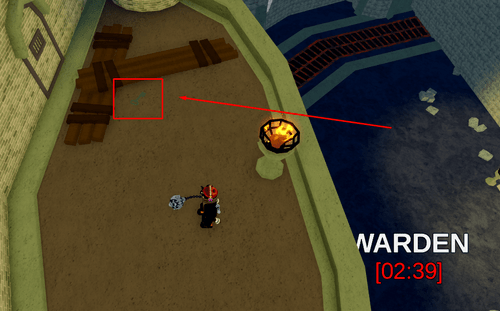
Make your way to the top floor of the Prison's main building. There, you can use the key to unlock the Office Gate.
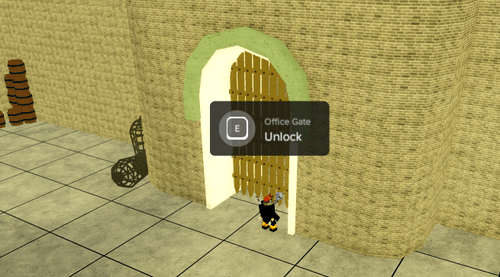
Proceed up the stairs past the gate and you'll eventually enter Don Megalo's cell. After your character is done talking, walk over to the office desk and try to take Don Megalo's Coat
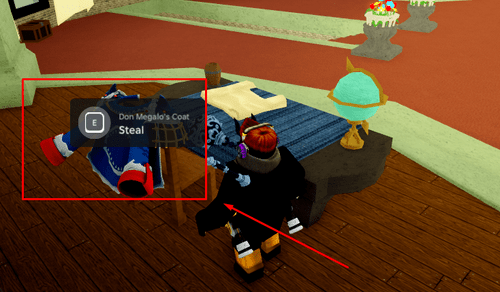
Before you can finish stealing the coat, a cutscene will play as the Megalo Guard boss walks in and threatens you. Defeat the boss so you can finally take the coat.
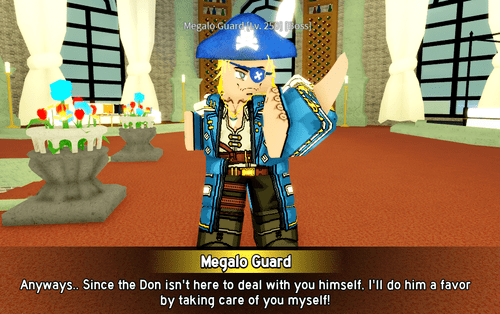
When you're done, return to the Jail Keeper to claim your free levels. This secret is also the new way of acquiring the Pink Coat, which is now one of the best accessories in Blox Fruits following the First Sea rework.
Secret #3 - Awakened Warden Boss
When the text "A cell creaks open..." appears, this means that the Warden can be awakened. At the prison's main building, you'll find a set of four levers in the first floor.
You must pull them in a specific order to trigger a cutscene that spawns the Awakened Warden.
This is different for every player, though a common pattern seems to be:
Red, Right Blue, Green, Left Blue. Try different combinations until it works!
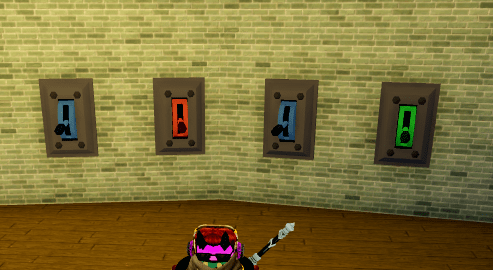
The Awakened Warden will spawn in the main building instead of the regular Warden's spawn location. Defeat him and claim your reward at the Jail Keeper.
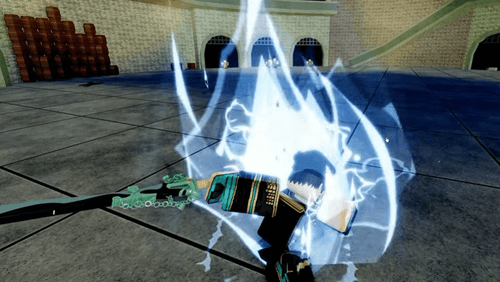
Colosseum Secrets
Unless stated otherwise, the main NPC for turning in secret quests in the Colosseum is the Colosseum Quest Giver NPC at the entrance.
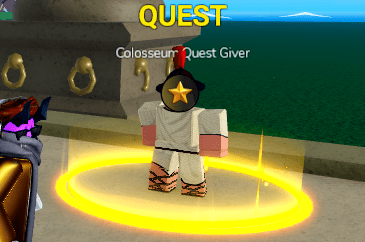
Secret #1 - Colosseum Fight
Head to the Colosseum Emperor NPC, who is overlooking the arena. Talk to him to start the arena minigame, then jump into the red circle in the middle:
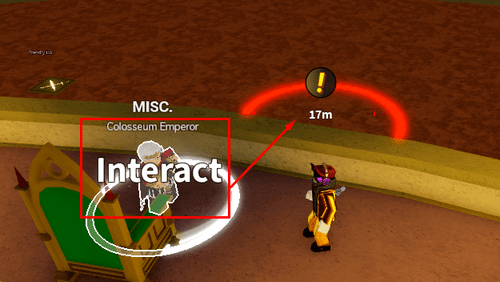
Defeat 3 waves of enemies and report back to the Colosseum Emperor to finish the quest. You can then claim your free levels from the quest giver NPC.
Secret #2 - The Champion's Statues
A few steps away from the Colosseum Quest Giver is a set of stone statues. You must hit each of them with the same weapon that they're holding. Here's a handy cheat sheet for this:
Statue | Attack Type |
|---|---|
| Sword |
| Fruit |
| Melee |
| Gun |
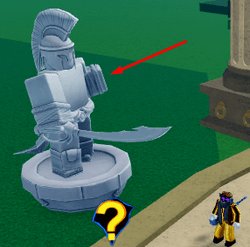
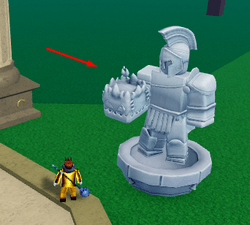
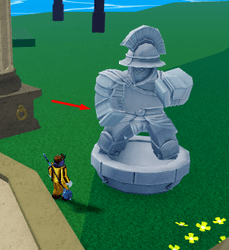
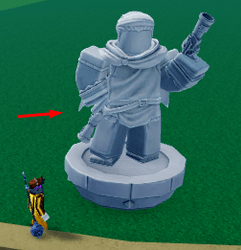
You'll know that you hit the statue with the correct attack type if its eyes start glowing (different color for each), like so:
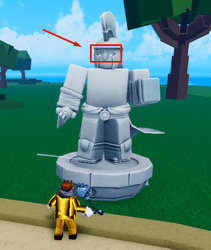
Keep hitting each statue with the correct style until they strike a different pose. Once all four statues have moved, a cutscene will play, and you can claim your rewards from the quest giver just beside the sword statue.
Secret #3 - The Crowd Favorite
When you see the message: "The Colosseum stands are filling up - the crowd wants a show!", head to the arena and start looking for a faint gray target marker, which can spawn along the walls.
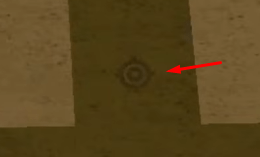
Shoot the gray marker with your gun to start a minigame. Chase and destroy all of the targets that will randomly spawn around the arena.
You have a minute and a half to complete the minigame, and the timer will be visible as a floating bar in the arena.
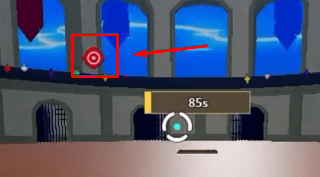
Once you've completed the minigame, the crowd will roar for you, and you can now claim your rewards from the Colosseum Quest Giver NPC.
Magma Village Secrets
In the Magma Village, the main NPC for secret quests is the Mayor in front of the docks.
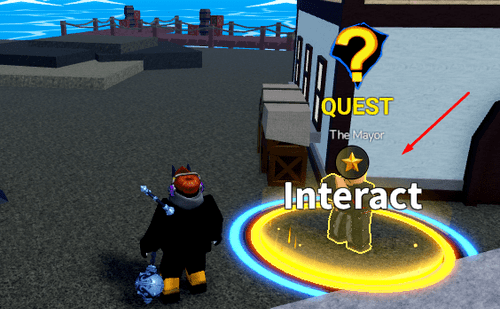
Secret #1 - The Magma Geyser
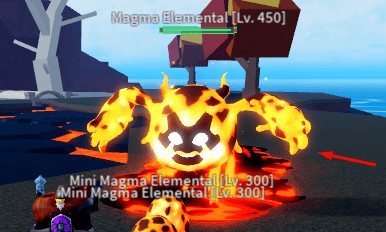
Near the docks is a small magma lake with a geyser in the middle. Approach the geyser and defeat the mini elementals that it shoots out.
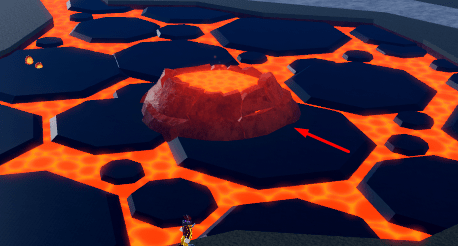
Afterwards, break the geyser and fight the Magma Elemental that spawns. When that's done, go to the Mayor to receive your free levels.
Secret #2 - Magma Drilling
When you get the message "A loud drilling is shaking the Magma Village", head to the back of the island to find the entrance of a mine.
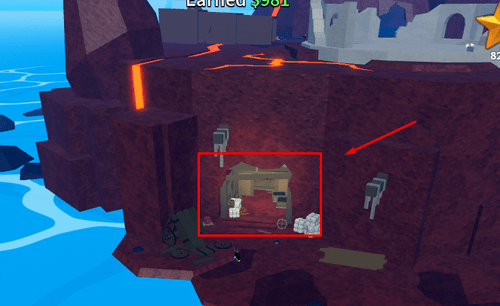
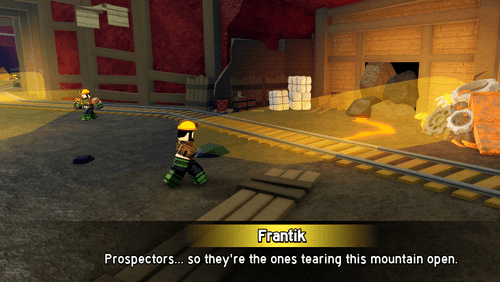
Enter it and step on the elevator, which will automatically descend. A cutscene will play, and you must avoid the prospectors' light beams as you push forward to the next elevator.
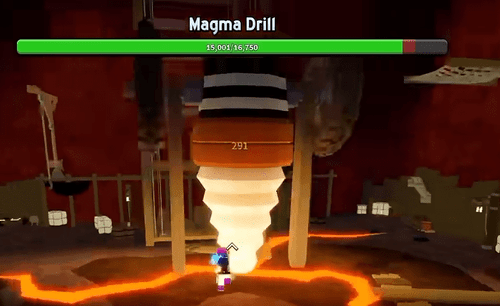
At the next elevator, you'll run into the Magma Drill. Destroy it to trigger some more dialogue, then use the elevator to leave and claim your rewards from the Mayor.
Secret #3 - Awakened Magma General
When you see the message "A rumbling echoes out to the sea...", this means that you can awaken the Magma General. Head to the volcano and destroy the glowing geysers scattered around it.
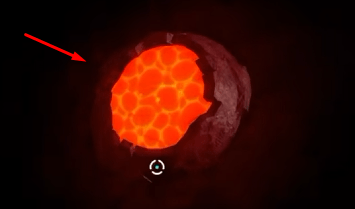
After destroying the last geyser, the Magma General will awaken. Kill him and claim your rewards from the Mayor.

Underwater City Secrets
In the Underwater City, the main NPC for turning in secret quests is King Neptune, who is by the entrance.
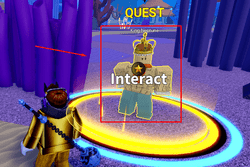
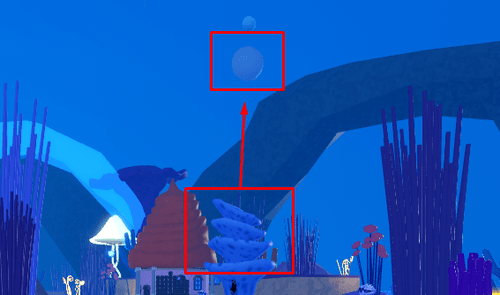
Secret #1 - Bubble Cave
For this first secret, ride one of the bubbles that spawn above the corals in this zone. This will take you to a secret cave.
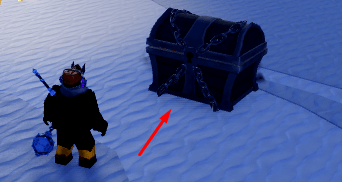
There will be a mysterious chest in this cave. Open it and kill the wraiths that spawn, then claim your rewards from King Neptune.
Secret #2 - Mysterious Lights
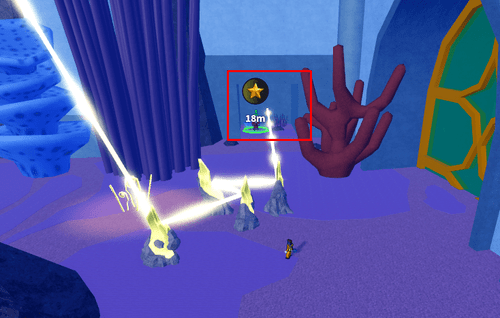
To the right of the main building in the Underwater City, you'll find a set of crystals, with some shooting lines of light out of them.
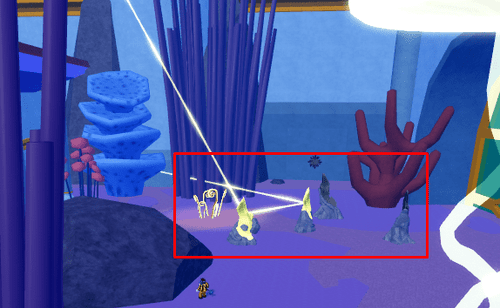
Simply push the two inactive gray crystals so that the light energy hits the marker on the wall up ahead. This will break the wall and reveal the Water Kung-fu Teacher, who will give you your free levels.
Secret #3 - Awakened Fishman Lord Boss
When you see the message "The water is stirring - the Fishman Lord has risen...", then the Fishman Lord is ready to be awakened. Roam the Underwater City and open Clam Shells until you find one that has the Pearl of the Deep in it.
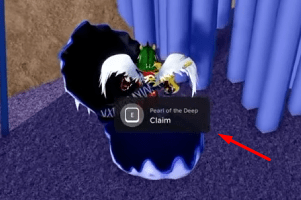
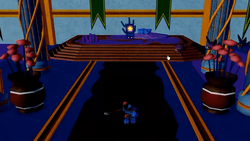
Upon claiming the pearl, the Awakened Fishman Lord will spawn in the main building. Kill him and get your rewards from King Neptune.
Fountain City Secrets
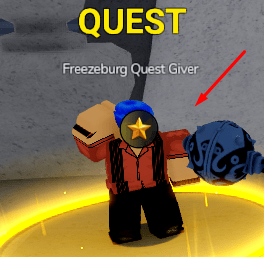
The main NPC for secret quests on Fountain City unless otherwise stated is the Freezeburg Quest Giver, who is near the main docks.
Secret #1 - Pipe Repair
Go to the central fountain and jump to the very top, where you will find some misaligned pipes leaking water. Attack them all until they are properly aligned.
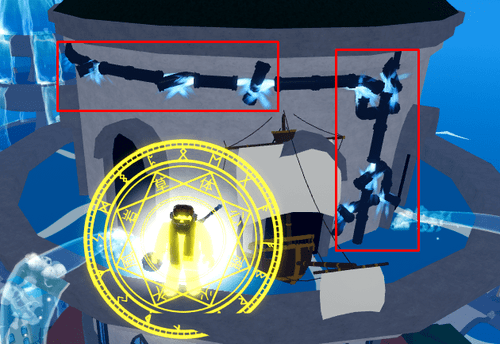
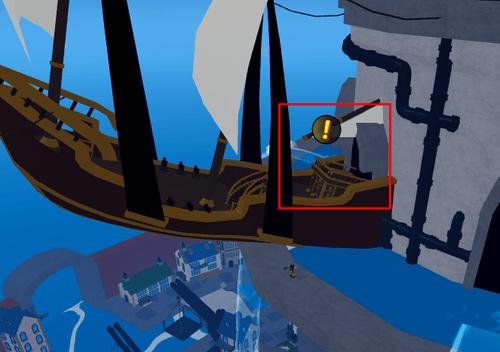
This will cause the ship stuck near the pipes to violently shake. Step onto the captain's wheel and watch the cutscene, wherein you and the ship are spat out into the sea.
Secret #2 - The Sewer Gang
Follow the path to the left of where the Freezeburg Quest Giver is located, and stop at the crane and platform with gray square tiles on it.
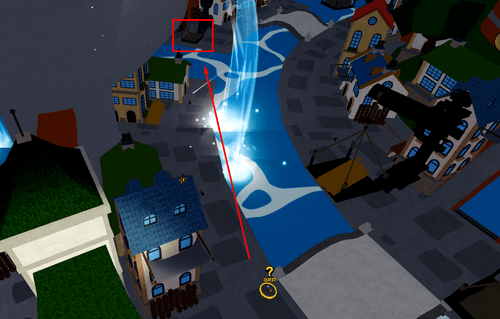
Step on the platform and interact with it to reveal a secret entrance. This will lead you to the Sewers, where you must defeat all of the enemies.
Server hop if there is no option to lift the platform!
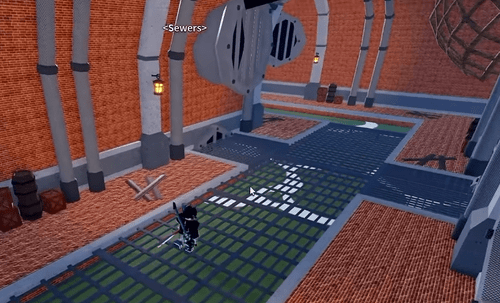
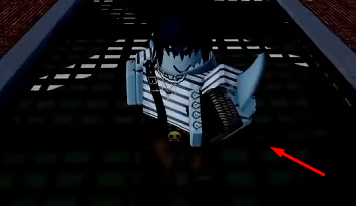
Kill every enemy you find and break through the walls of junk to reveal new rooms. At the end, you'll fight the Megalo Brute boss. After defeating the boss, claim your rewards from the Freezeburg Quest Giver.
Secret #3 - Awakened Cyborg Boss
When the message "The junkyard has been magnetized by lightning..." appears, head to his spawn point in Fountain City. There, you'll find broken wires all around the arena. Attack the wires to fix them.
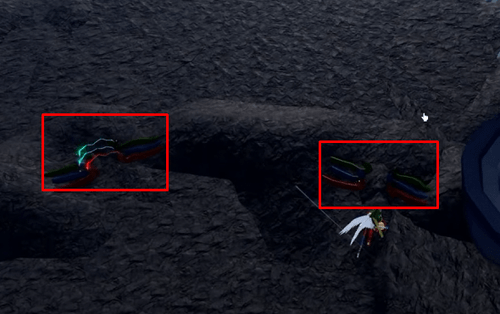
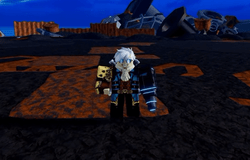
Upon fixing all of the wires, the Cyborg boss will awaken. Defeat him and claim your free levels from the Freezeburg Quest Giver.
Middle Town Secrets
In Middle Town, the Experienced Captain NPC that you normally talk to in order to move to the Second Sea is your contact for the secret quests on the island.
Secret #1 - The Gamer
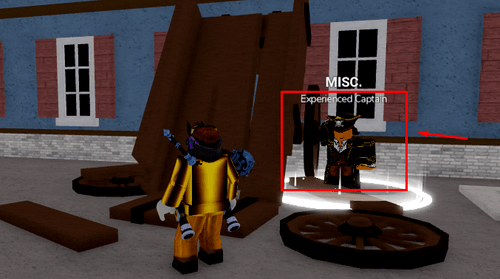
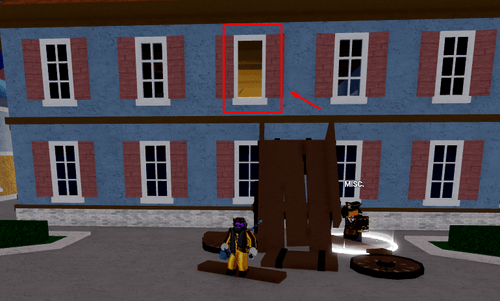
Head to where the Experienced Captain and his broken cart are located. In the building behind them, use any fruit ability to break the middle window, then jump into the room before the window respawns.
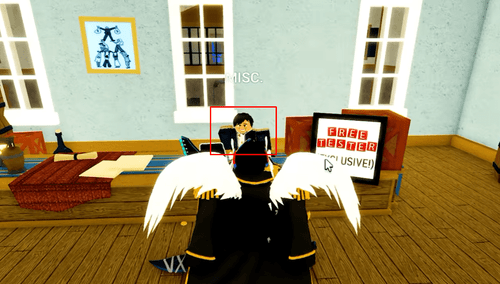
Once inside, you must wait for the NPC named Janus to walk out and sit on the desk in this room. Accept his quest to start the next step.
Go back outside and head to the front door of the yellow and red building beside the one you were just in.
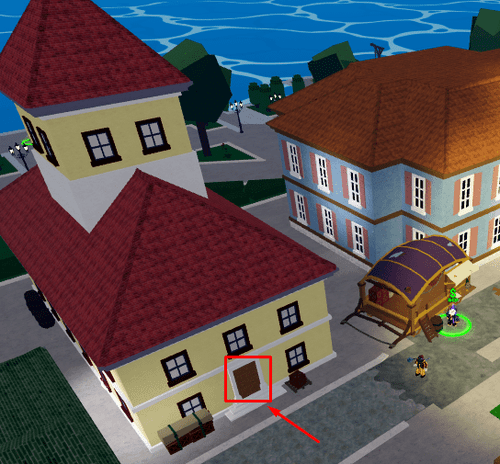
This is Robotmega's office, but you can ignore the NPCs inside. Grab the Rear Door Key from behind the Aura Editor NPC.
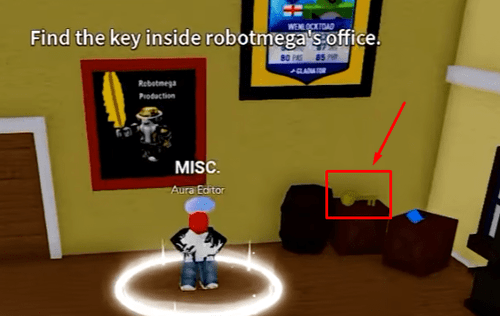
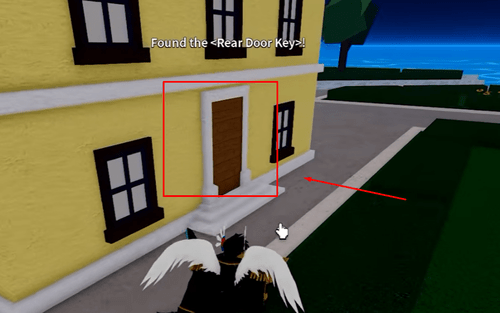
With the key on hand, head outside then proceed to the back of the building. Unlock the rear door and watch the cutscene. Afterwards, return to Janus to complete the quest!
Secret #2 - Lookout Duty
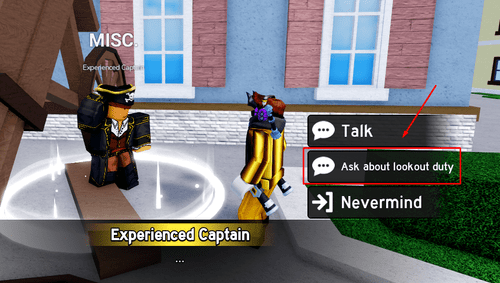
For this secret, talk to the Experienced Captain and select the "Ask about lookout duty" option. There are two outcomes here:
- He tells you to come back another time - You'll be told when you should ask about it again (it can be several hours)
- You're given the option to "Keep lookout" - Press "Keep lookout" and be ready for the minigame.
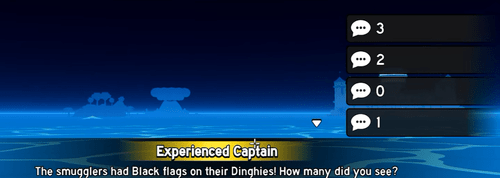
Once the minigame begins, you have to pay close attention to all of the boats that will pass through your screen. The Experienced Captain will ask you various questions that will test your memory.
You need to complete four correct answers in a row. When you've completed the minigame, a brief cutscene will play and you can then claim your free levels from the NPC.
Secret #3 - The Treasure Hunt
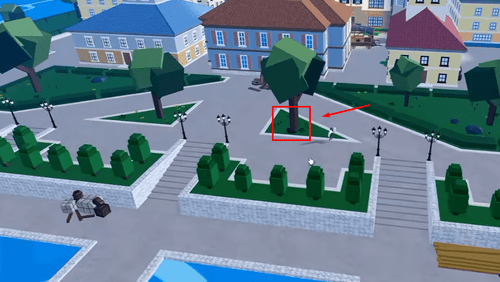
For this one, you first need to get a Treasure Map, which can drop from any of the trees and barrels scattered throughout Middle Town. Keep attacking them until you encounter one that shakes. Destroy whichever object shakes so that a Treasure Map drops on the ground.
This can take a lot of time, and server hopping may help speed up the process.
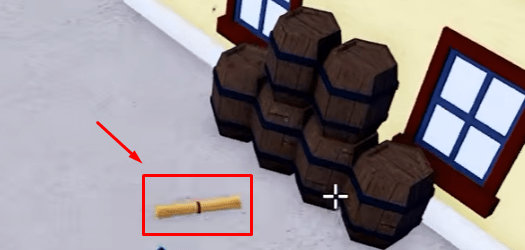
Pick this up and use it to see where you have to go next. How it works is that it will reveal one new location at a time, and you'll need to find each piece of the treasure map until the entire set has been completed. Here's the full picture with all the hints revealed:
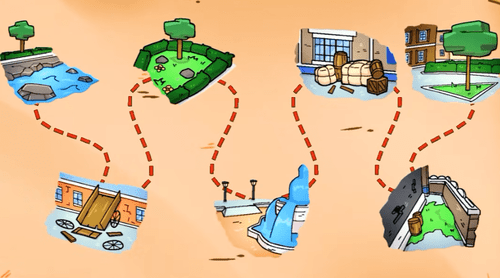
Here are all of the locations you must go to:
Broken Piece # | Location | Image |
|---|---|---|
1 | Under a tree near a yellow & blue building with a green roof, close to the docks. |
|
2 | The wrecked cart beside the building near the first broken map piece. |
|
3 | Under another tree, this time in front of where the broken cart for piece #2 is located. |
|
4 | Beside the fountain in the middle of the island. |
|
5 | Beside a stack of barrels near where the Blox Fruit Gacha and Blox Fruit Dealer NPCs are located. |
|
6 | Beside the Blox Fruit Dealer. |
|
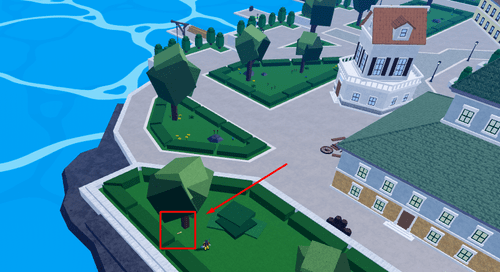
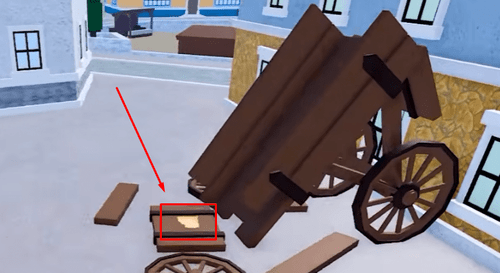
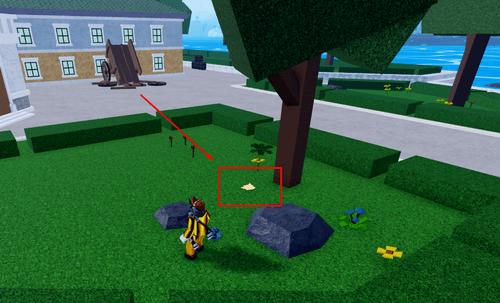
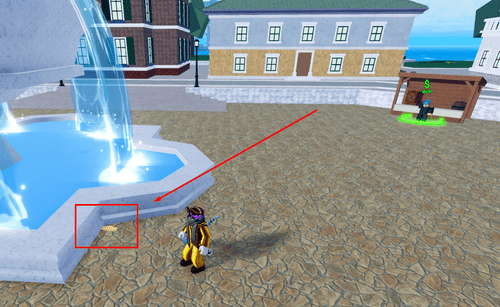
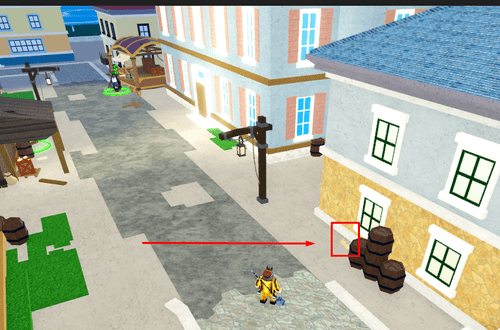
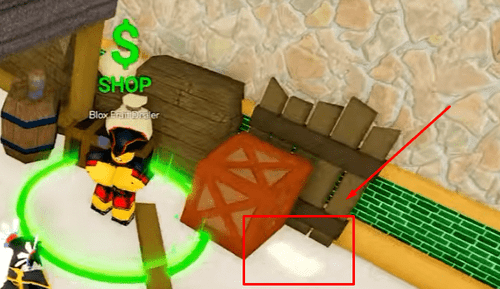
Finally, with all map pieces collected, you can now reveal and interact with the Buried Treasure chest. This is located near the docks, in front of where the Experienced Captain is found:
Beat up the mound of dirt there to reveal the Buried Treasure and open it to spawn three Treasure Skeletons. Upon killing all three, you can claim your free levels at the Experienced Captain.