Ultimate Jujutsu: Zero Tier List - All Clans, Weapons & Accessories
All you need to know to become the ultimate sorcerer!

Tell us about your article reading experience.
- No
- Sort of
- Yes

In Jujutsu: Zero, there are many aspects of your character that determine how powerful you are, be it your clan, cursed technique, or even gear. To help you become the best sorcerer around, we've compiled tier lists for all of these based on the current meta and community sentiment.
Cursed Techniques Tier List
Cursed Techniques give you a set of special abilities to use, and having a really good one will make you extremely powerful, especially with the right build. Here are the best (and worst) Cursed Techniques.
- S Tier
 Limitless
 Ten Shadows
 Awakened Blood Manipulation
 Awakened Star Rage
- A Tier
 Shrine
 Judgeman
 Beast Amber
 Copy
Copy
- B Tier
 Projection Sorcery
 Disaster Tides
 Disaster Flames
 Star Rage
 Blood Manipulation
 Solo Forbidden Area
 Love Train
 Energy Discharge
- C Tier
 Ratio
Ratio Cursed Speech
 Straw Doll
 Exploding Flesh
Breakdown of Cursed Technique Ratings
S Tier - The Strongest of Today
These Cursed Techniques are generally seen as the best of the best, even without a fully-optimized build. If you can get these, you are going to have an easy time grinding and clearing any content in the game.
Cursed Technique | Rarity | Reason for Rating |
|---|---|---|
Limitless | Special Grade | Recently buffed and grants massive potential DPS, especially when paired with the Gojo clan. |
Ten Shadows | Disaster Grade | Lets you spawn really strong Shikigamis to overwhelm opponents. |
Awakened Blood Manipulation | Disaster Grade | Very good moveset that gets even stronger after unlocking some of its bonuses. |
Awakened Star Rage | Disaster Grade | Extremely good DPS and range, with quick cooldowns to boot. |
A Tier - The Strongest of History
The Cursed Techniques in this tier are also really strong, but may be a bit more dependent on having certain other bonuses or builds to reach their peak potential.
They only miss out on the top spot by being a little less versatile or hard to pull off.
Cursed Technique | Rarity | Reason for Rating |
|---|---|---|
Shrine | Special Grade | Potentially very strong, but requires Sukuna's Mark and the Sukuna clan for max damage output. |
Judgeman | Special Grade | Can be hilariously OP with some setup, especially if you can land Death Penalty. |
Beast Amber | Special Grade | Busted DPS especially after its buffs, but mainly used as a secondary behind stronger CTs |
Copy | Special Grade | Can be really strong if you copy certain bosses and have a build that synergizes with it. |
B Tier - Early Game or Niche
The ones in this tier aren't necessarily bad, but they are usually replaced later on by stronger techniques or are only picked for specific types of content.
Cursed Technique | Rarity | Reason for Rating |
|---|---|---|
Projection Sorcery | Special Grade | Underwhelming due to being mainly a single-target CT, but has niche uses (e.g. PVP). |
Disaster Tides | Grade 1 | Decent AOE and damage for grinding. |
Disaster Flames | Grade 1 | Can be really good early game due to its burn. |
Star Rage | Grade 1 | Pretty good for grinding, but nothing special overall. |
Blood Manipulation | Grade 1 | Actually pretty good for grinding, but often outclassed by other CTs, even in the same tier. |
Solo Forbidden Area | Grade 1 | Quest-locked CT with some good but somewhat niche utility. |
Love Train | Special Grade | Can be pretty good with its domain active, but otherwise just okay most of the time. |
Energy Discharge | Special Grade | Decent damage output but a bit underwhelming for a Special Grade CT. |
C Tier - Avoid Using
The Cursed Techniques in the bottom tier aren't as good as the others, and since it's easy to get the ones above these (especially if you redeem some codes for Jujutsu: Zero), they're not really worth using.
Cursed Technique | Rarity |
|---|---|
Ratio | Grade 2 |
Cursed Speech | Grade 2 |
Straw Doll | Grade 3 |
Exploding Flesh | Grade 3 |
Clans Tier List
Clans can be rerolled in the main menu, and they grant varying passive bonus stats with a few debuffs to balance them out. Both limited and regular ones will be included in this list.
NOTE: No breakdown for this tier list, as the vast majority of the reasoning for these ratings, barring certain CT synergies, boils down to just "Rarer = Better".
- S Tier
 Patrick
- Sugawara
- Amanai
 Toji
Toji- Tsukumo
- Noritoshi
- A Tier
- Kashimo
- Sukuna
 Gojo
Gojo- Kenjaku
- Hakari
- Higuruma
- Ishigori
- Geto
- Tengen
- Zenin
- B Tier
 Fushiguro
- Abe
- Kamo
- Okkotsu
- C Tier
 Todo
Todo- Inumaki
- Kugisaki
- Nanami
 Itadori
- Miwa
- Fujiwara
Accessories Tier List
These are all the accessories currently in the game, and these ratings will be based on how well they stack up from early to endgame content, depending on when you can get them.
- S Tier
 Divine General's Wings
 Inventory Curse
 Yuki's Helmet
 Legacy of the Forgotten
 Thug Flamingo Floatie
 Amanai's Hat
 Divine Wheel
 False Wheel
- A Tier
 Zenin Hakama
 Dagon's Wings
 Yuki's Goggles
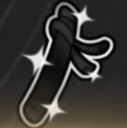 Yuta's Sheath
- B Tier
 Panda Plushie
 Cursed Talisman
 Promise Ring
 Gojo's Blindfold
 Curse King Tattoo
 Blood Trail
- C Tier
 Cursed Aura
 Light Aura
 Basic Ring
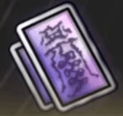 Enhanced Talisman
 Infused Gloves
- D Tier
 Basic Gloves
 Paper Talisman
Breakdown of Accessory Ratings
S Tier - The Best Overall Choices
These accessories are generally just very good overall, and some of them buff some top tier Cursed Techniques that are often used in endgame content.
Accessory Name | Rarity | Reason for Rating |
|---|---|---|
Divine General's Wings | Disaster Grade | Amp for Ten Shadows accompanied by massive all-around buffs that are good for anyone. |
Inventory Curse | Special Grade | Extremely good general weapon buff, especially with high HP. |
Yuki's Helmet | Special Grade | Huge buffs for Awakened Star Rage. |
Legacy of the Forgotten | Special Grade | Huge buffs for Awakened Blood Manipulation. |
Thug Flamingo Floatie | Disaster Grade | Great all-around buffs, especially if you're using a Summer Blade. |
Amanai's Hat | Disaster Grade | Same as the Thug Flamingo Floatie. |
Divine Wheel | Special Grade | Massive buffs for Ten Shadows users. |
False Wheel | Disaster Grade | Same as Divine Wheel. |
A Tier - Very Good Alternatives
These accessories are more situational, but in the right build, one could make a case for them being among the best as well.
Accessory Name | Rarity | Reason for Rating |
|---|---|---|
Zenin Hakama | Special Grade | Strong amps for Ten Shadows and Projection Sorcery, and provides decent CE regeneration and a huge CD buff. |
Dagon's Wings | Disaster Grade | Huge amp for Disaster Tides users, and buffs Playful Cloud as well. |
Yuki's Goggles | Special Grade | Huge buffs for Star Rage and Awakened Star Rage, and comes with some decent CD and ATK buffs as well. |
Yuta's Sheath | Special Grade | A good specialized choice for Copy users. |
B Tier - Decent or Niche Accessories
The ones in this tier are also situational, but can be really good if paired with the right synergies (including certain clans and more).
Accessory Name | Rarity | Reason for Rating |
|---|---|---|
Panda Plushie | Disaster Grade | Decent all-around buffs. Jack-of-all-trades, master of none. |
Cursed Talisman | Disaster Grade | Huge CT Amp boost, especially with high cursed energy. |
Promise Ring | Special Grade | Great, especially for Copy users. |
Gojo's Blindfold | Special Grade | Huge boost specifically for Limitless users. |
Curse King Tattoo | Special Grade | Strong buffs for Shrine & Kamutoke users. |
Blood Trail | Special Grade | Mainly good for Blood Manipulation and Awakened Blood Manipulation users, but has decent CE and HP buffs too. |
C Tier - Early Game & Very Niche Picks
Accessory Name | Rarity | Reason for Rating |
|---|---|---|
Cursed Aura | Special Grade | Potentially great damage buff if you stack up a lot of HP. |
Light Aura | Special Grade | Huge HP boost for early game players. |
Basic Ring | Special Grade | Decent damage buff for early game players. |
Enhanced Talisman | Special Grade | Pretty good CT buffs early on. |
Infused Gloves | Special Grade | Can provide decent situational weapon amp buffs. |
D Tier - Not Worth It
These accessories just aren't worth it in general. You may want to use them if you have literally nothing else, but you outgrow them immediately.
Accessory Name | Rarity | Reason for Rating |
|---|---|---|
Basic Gloves | Special Grade | Small weapon amp (30%). |
Paper Talisman | Special Grade | Small CT amp (30%). |
Weapons Tier List
Finally, here are all of the weapons (mainly swords) that you can get in the game, ranked from best to worst. These are pretty straightforward, but we'll provide some brief reasonings for each rating.
- S Tier
 Summer Blade
 Playful Cloud
 Zenith Spear
- A Tier
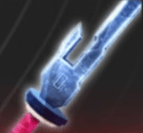 True Inverted Spear of Heaven
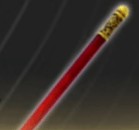 Nyoi Staff
 Kamutoke
- B Tier
 Festering Life Sword
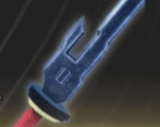 Inverted Spear of Heaven
 Split Soul Katana
- C Tier
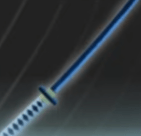 Light Katana
 Dragon Bone
Breakdown of Weapons Tiers
S Tier
These are the best of the best in general use, especially in endgame content. You can never go wrong with any of these weapons, but make sure to pick one that best fits your playstyle and current build.
Weapon Name | Rarity | Reason for Rating |
|---|---|---|
Summer Blade | Disaster Grade | Massive passive buffs, very flashy look, and huge AOE moves. |
Playful Cloud | Disaster Grade | Good CD and CR buffs with some decent moves. |
Zenith Spear | Calamity Grade | HUGE CD and damage buffs, impactful moves, and a cool aesthetic. |
A Tier - Great Alternatives
Depending on your build, these weapons may even be pushed up to the top tier. Overall, they're strong picks that are only slightly outclassed by those above.
Weapon Name | Rarity | Reason for Rating |
|---|---|---|
True Inverted Spear of Heaven | Disaster Grade | Massive passive bonuses and strong moves. |
Nyoi Staff | Special Grade | Quick and painful moves, decent buff, and has some good synergies with certain clans/CTs. |
Kamutoke | Disaster Grade | Huge passive buffs, good abilities, and potentially strong synergies with specific builds. |
B Tier - Decent Swords
While far from the best, these swords offer some pretty decent buffs and movesets that are completely usable for grinding and even a bit of PVP if you really want to.
Weapon Name | Rarity | Reason for Rating |
|---|---|---|
Festering Life Sword | Special Grade | Decent AOE and passive buffs. |
Inverted Spear of Heaven | Special Grade | Huge passive buffs with an okay moveset. |
Split Soul Katana | Disaster Grade | Good passive buffs and a quick and impactful moveset. |
C Tier - Fairly Weak
These weapons are pretty weak, but you don't really have many choices early in your account progression. You'll outgrow these rather quickly.
Weapon Name | Rarity | Reason for Rating |
|---|---|---|
Light Katana | Grade 2 | Weak early game weapon. |
Dragon Bone | Special Grade | Relatively weak crafted sword. |