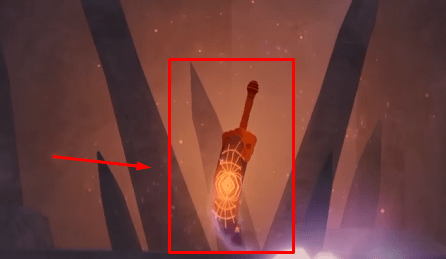
How to Get the Olympian Godbreaker in Fisch
The power of the gods in the palm of your hands!


Tell us about your article reading experience.
- No
- Sort of
- Yes

The Olympian Godbreaker is one of the best rods in Fisch due to its high stats, valuable mutations, and really good abilities. It's one of the rods that everybody in the late game should already have, but obtaining it is a daunting task.
To help you out, this guide will take you through all of the steps you'll need to take in order to get the Olympian Godbreaker.
Entering the Wrath of Olympus
First, head over to Grand Reef, which is the starting point if you want to go to Atlantis. Jump into the hole at the middle of the zone:
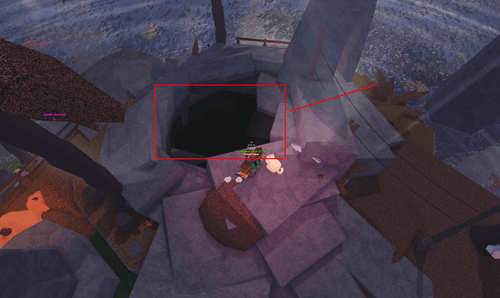
If you don't already have a Tidebreaker, it's highly recommended to buy the Advanced Diving Gear and Super Flippers just beside where you spawn in Atlantis!
Once inside, dive straight down until you reach the entrance to Wrath of Olympus. Touching it will start a cutscene as you are welcomed to the first layer.
Layer 1 - Bellona's Frenzy of War
The first layer you must go through in your quest to get the Olympian Godbreaker is called Bellona's Frenzy of War. Inside, you'll have to complete a set of sub-quests before you can proceed to the next layer.
Sub-Quest #1. Missing Swords
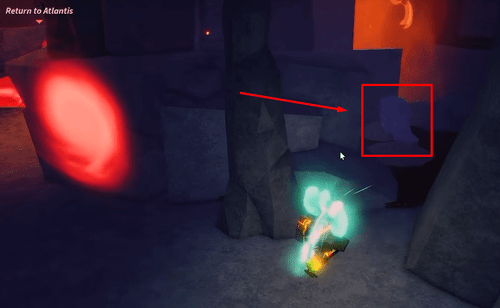
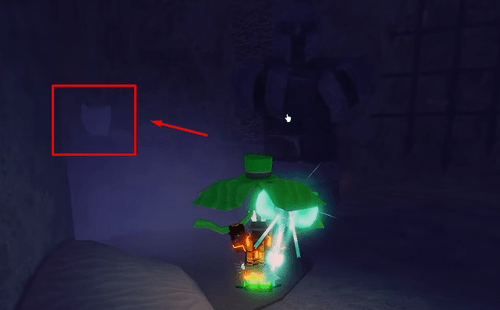
This quest is for the Royal Guard statue located at -8634, -2345, 626, which is to the northwest of where the portal back to Atlantis is located. If you interact with it, you'll be told that there are swords missing from the weapon rack.
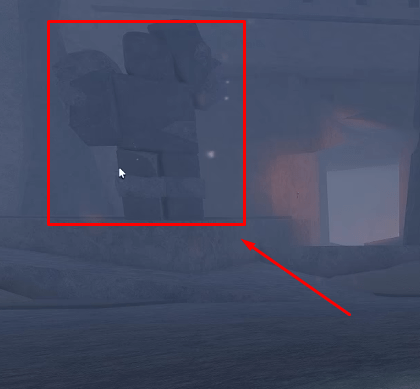
You'll now have to find 5 swords that are hidden around the cave. Here are all of their locations:
Sword # | Description | Image |
|---|---|---|
1 | Immediately to the right of where the Royal Guard statue without a helmet is located |
|
2 | To the southwest of the cave, sitting on a rock. |
|
3 | To the southeast of the cave, stuck to a rock on higher ground |
|
4 | Eastern part of the cave, stuck to a statue near the red seal on the ground |
|
5 | Northern part of the area, in a separate little cave containing the pond you'll be fishing at in the next part |
|
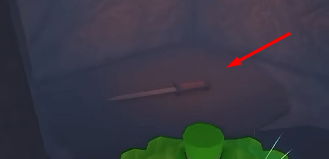
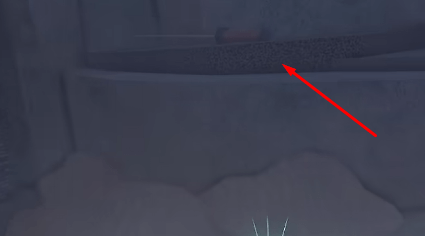
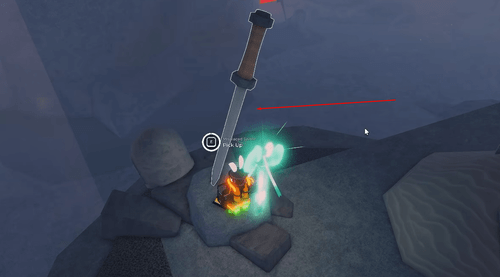
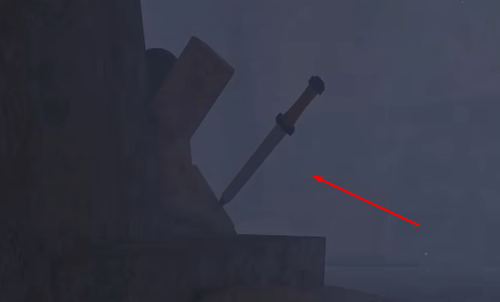
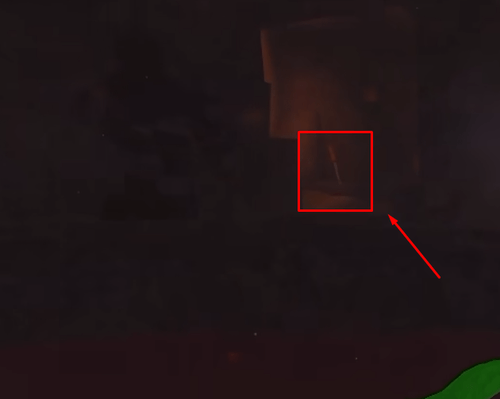
With all 5 swords in your inventory, head back to the starting point. There is an empty sword rack just a bit to the right of the Royal Guard statue that isn't wearing a helmet. Insert all of the swords in the rack.
After doing that, a secret passage will open on the right.
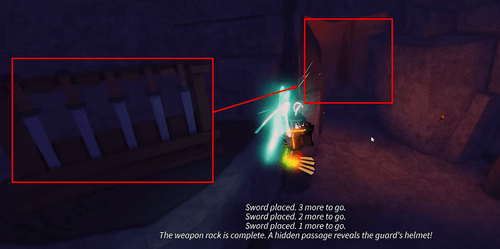
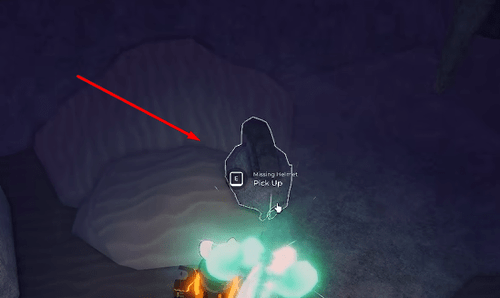
Upon entering the secret passage, you'll find the guard's missing helmet at the very end of the hallway. Pick it up and return it to the statue from earlier. You should then see the following message:
This guard stands at ease, Its helmet has been returned.
Sub-Quest #2. Shield Fragments
In the northern part of the area, where the pond for fishing is located, interact with the Royal Guard statue near the cave where you got the final missing sword from earlier.
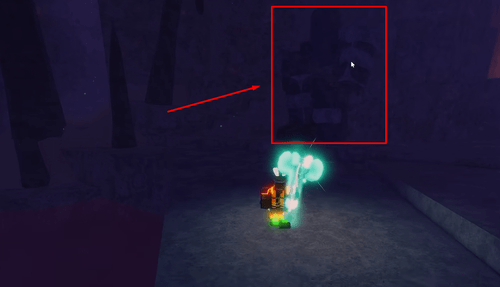
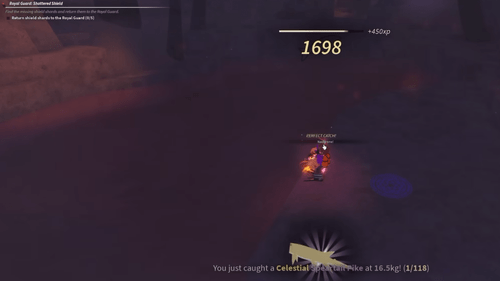
Some of the fragments must be fished, but there are a few that can be acquired around the layer. Here is a list of all 5 fragments:
Shield Fragment | Description | Location |
|---|---|---|
Cracked Aegis Shard | Immediately to the right of the portal back to Atlantis |
|
Shattered Aegis Shard | Southeast part of the layer, near another Royal Guard statue you can interact with |
|
Sunken Aegis Shard | Fished from the pond in the northern part of the layer |
|
Bloodied Aegis Shard | Fished from the pond in the northern part of the layer during a War Surge event (Start Sub-Quest #3 when the event happens) |
|
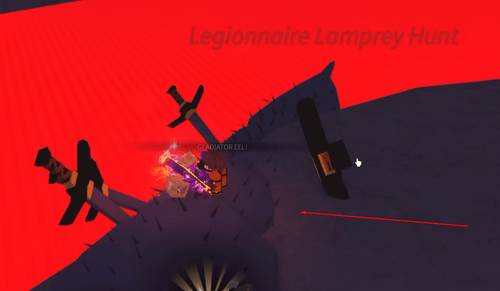
Legionnaire's Aegis Shard | Rewarded upon catching a Legionnaire Lamprey, which spawns at the same pool where War Surges can occur (Automatically spawns after 25 Perfect Catches during a War Surge) - More info in The Boss Fight section |
|
Sub-Quest #3. War Surge
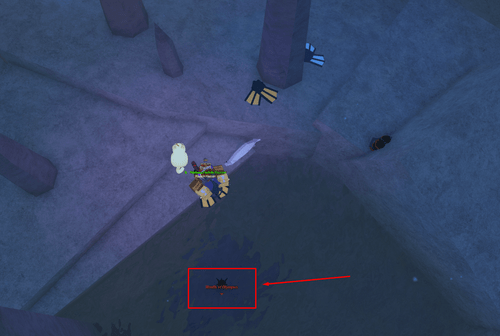
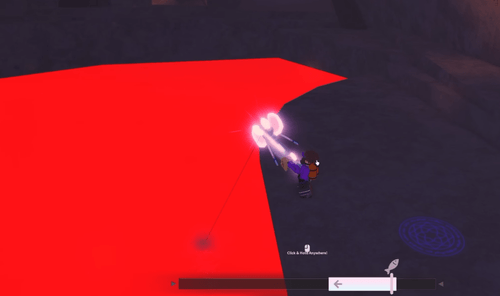
The War Surge event starts randomly in the cave while fishing with high disturbance. Once it activates, the entire pool of water will turn a bright red, like so:
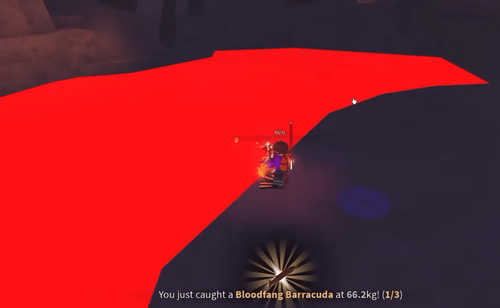
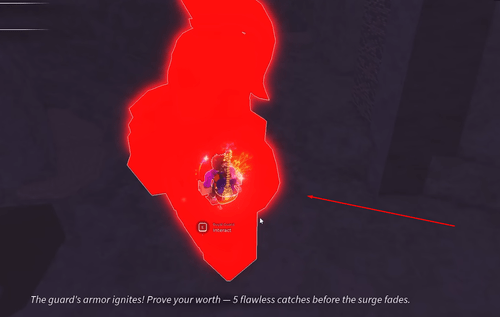
When this event starts, make sure to talk to the Royal Guard statue near the location where you picked up the Shattered Aegis Shard (he should be glowing red now).
This will start a quest to get 5 Perfect Catches during a War Surge.
The Boss Fight
The Legionnaire Lamprey is a pretty standard boss fight where you have to avoid the swords that appear, as they will try to reduce your progress.
Once you do catch this Hunt fish, you'll immediately get a message stating: "Bellona attacks!" This will start a minigame in which you have to survive a whole minute by dodging all of the projectiles in the fishing bar.
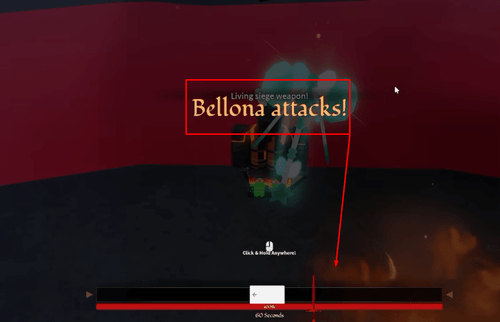
There isn't much advice we can give you here, so try your best to avoid all of the swords, arrows, and orange spears that appear on the bar. Pretend that you are the fish and you have to avoid everything.
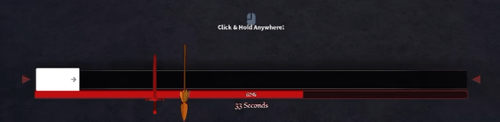
Upon surviving the minigame, a cutscene should play as the red seal in the middle of the layer breaks. You can now proceed to the next one.
How to Get the Bellona's Waraxe
You must have a 100% Bestiary for this layer before you can buy the rod.
Return all five shield fragments to the Royal Guard statue near the pond. This will open another secret passage in the same tunnel where you got the guard's helmet earlier.
Inside, you can purchase the Bellona's Waraxe for 5,000,000 C$.
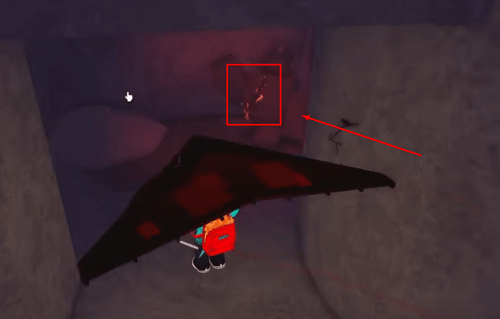
Layer 2 - Apollo's Song of Light
As soon as you enter this layer, you'll notice another seal blocking the way. This time, it's a golden seal on the ground. Before we get started, you'll need to interact with 5 instruments.
Interact with the instruments in the order they're shown below:
Instrument | Description | Image |
|---|---|---|
Drum | Found near the portal to the previous layer, just beside the pool of water you'll be fishing on |
|
Banjo | Directly behind the rock pillar where the drum is resting |
|
Saxophone | Northeast of where the banjo was located |
|
Cello | On the western part of the layer |
|
Harp | Directly in front of where the portal to the previous layer is located |
|

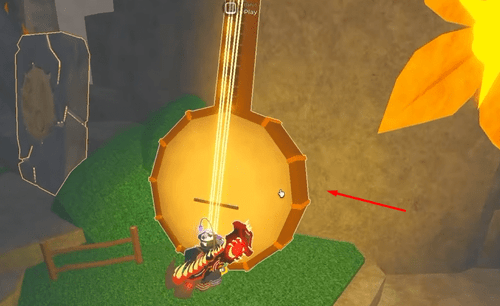
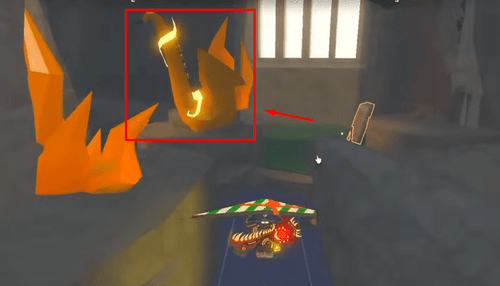
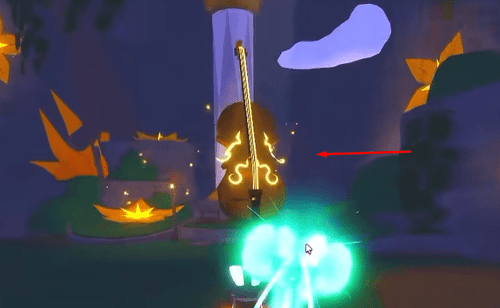
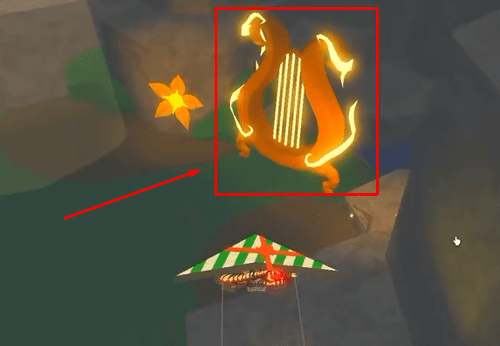
This will trigger a brief cutscene revealing a tree hidden behind a previously locked door.
The 5 Mirrors
Next, in preparation for breaking the seal, you must turn 5 mirrors that are scattered around the seal itself. Rotate each of the mirrors until they are facing the seal.
Here are their locations:
Mirror # | Description | Image |
|---|---|---|
1 | Just beside the seal itself, on top of a rock |
|
2 | Directly behind the giant drum |
|
3 | On the rocks above the second mirror, to the west |
|
4 | South of the fourth mirror, on higher elevation just across the cliff it's on |
|
5 | Beside a marble pillar across the seal from Mirror #1 |
|
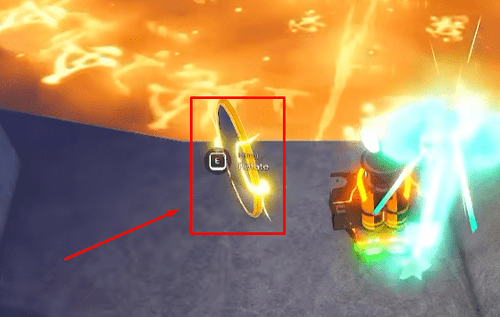
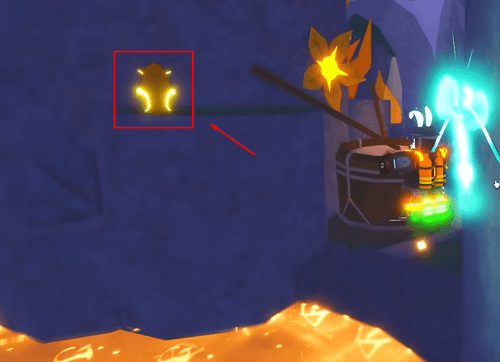
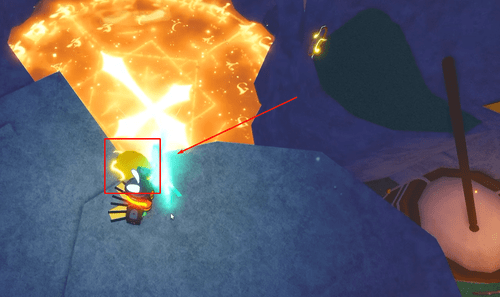
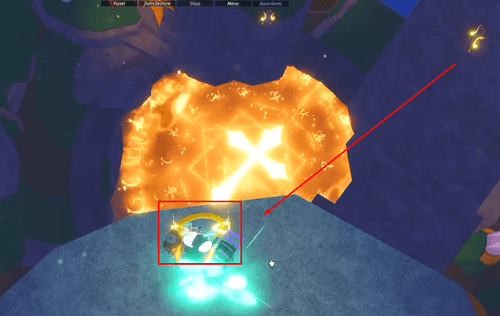
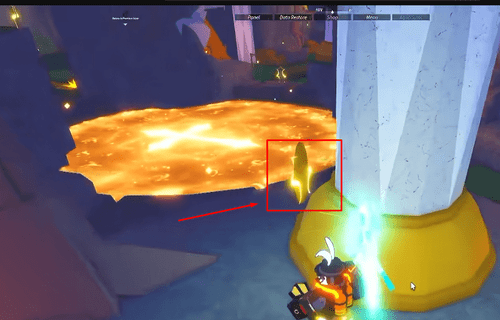
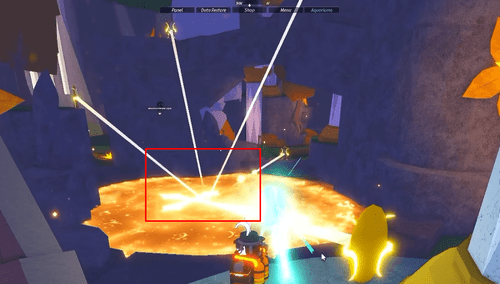
Once all the mirrors are facing the seal, you should see beams of light appear from each of them, all pointed at the center of the seal. Now you can proceed to the hunt part of the layer.
IMPORTANT: You have to do this every time you log back into the game until the seal is broken!
The Helios Sunray
To progress to the next layer, you must first trigger a Helios Sunray Hunt after aligning all of the mirrors. With a high disturbance rod, start fishing in the waters of this layer.
Make sure to do so in the light beams that appear over the water. Fishing outside of them will give you a massive penalty in luck and lure speed.
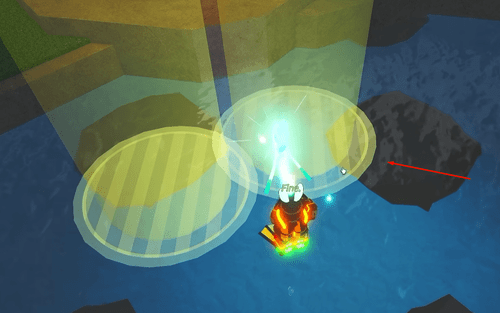
Eventually, you'll trigger a Solar Chorus event. When that happens, you can spawn the Helios Sunray Hunt by catching 25 Legendary fish while the Solar Chorus is active.
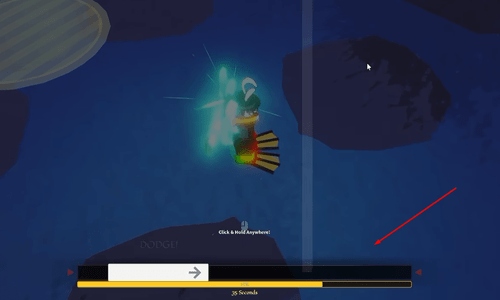
During the Hunt, once you've started reeling in a Helios Sunray, you must avoid the falling instruments at all costs, or else you'll lose a lot of progress.
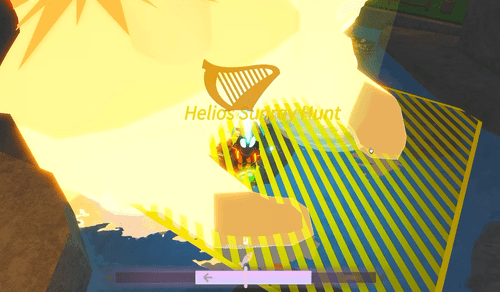
Upon catching the Helios Sunray, you'll start yet another survival minigame. Dodge all of the instruments and beams of light for a whole minute and keep your HP above zero in order to break this layer's seal.
How to Get the Apollo's Sunshot Rod
You must have a 100% Bestiary for this layer before you can buy the rod.
This layer's unique rod requires an active Solar Chorus event. Once the event is active, you must activate all of the tablets scattered throughout the layer.
To activate them, you must fish beside them. If a tablet lights up or flashes for a brief moment, that means it's now active. There are 8 tablets in total:
Tablet # | Description | Image |
|---|---|---|
1 | Beside a pool of water near the seal |
|
2 | Beside another pool of water to the southwest of Tablet #1 |
|
3 | To the northwest of the previous tablet, past the giant cello |
|
4 | A few steps away from the giant drum |
|
5 | Beside the giant harp |
|
6 | Between the giant drum and the area unlocked by the instruments earlier |
|
7 | Directly behind Tablet #6 |
|
8 | Beside the giant banjo |
|
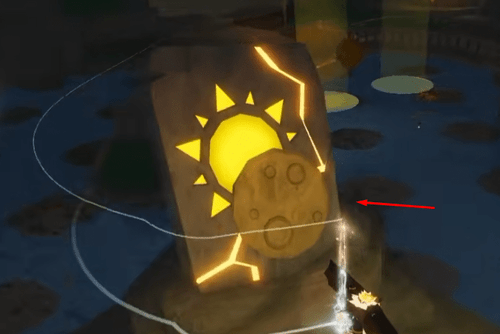
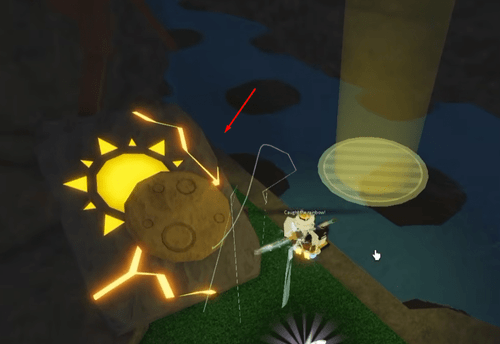
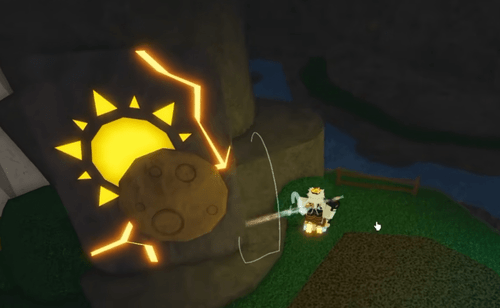
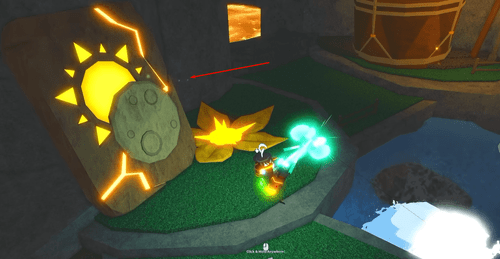
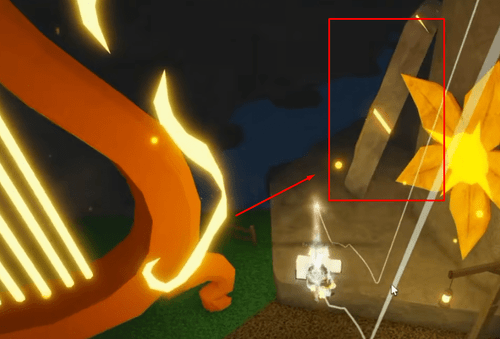
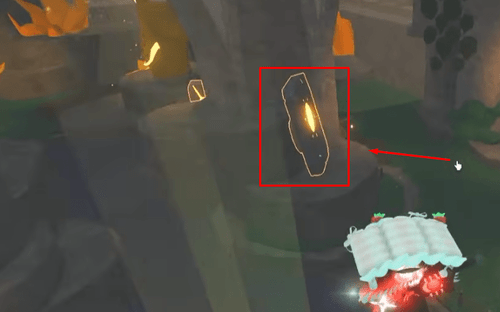
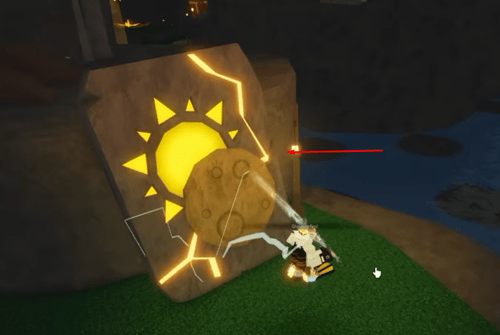
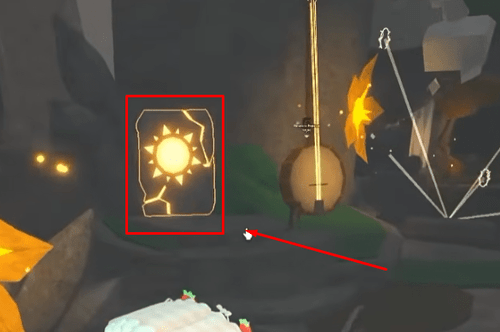
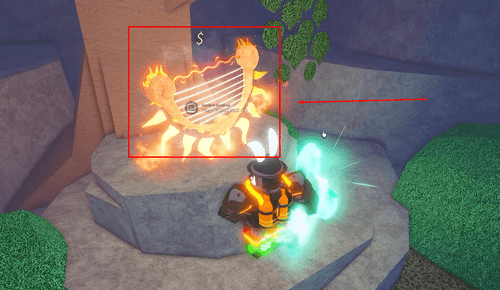
Upon activating all eight tablets during the Solar Chorus, the Apollo's Sunshot will spawn beside the tree that was hidden behind the locked door opened by the giant instruments.
You can buy the rod for 17,500,000 C$.
Layer 3 - Poseidon's Storm of Floods
This layer is a lot more straightforward than the others, as your main focus will be triggering events via high disturbance. First, you'll want to activate a Storm Flood event, which happens randomly.
Once it starts, the whole layer will start flooding with water. Fishing during this event will give you a chance to spawn a Tidecrasher Archon Hunt.
You can guarantee the hunt's spawn by catching 25 Atlantean or King's Blessing mutated fish during the flood. A Trident Rod or Poseidon Rod may be of use here.
Keep at least 4 of these Atlantean and/or King's Blessing mutated fish for later!
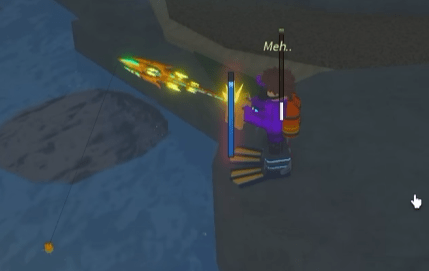
The fish itself is going to be similar to the other boss fights in the previous layers. Just try your best to avoid all of the objects flying towards your bar while reeling it in.
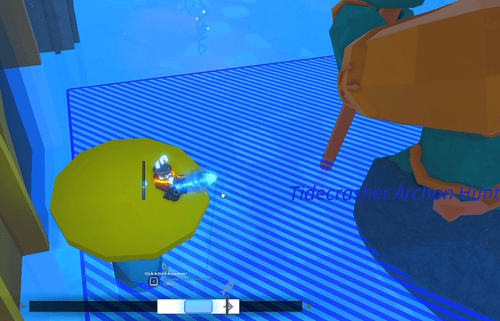
Upon catching it, you'll initiate the minigame for breaking the seal. Avoid everything that the game throws at you, including the waves that have a large blue telegraph before they appear.
If you manage to survive through the minigame, you'll see another cutscene in which the seal is broken.
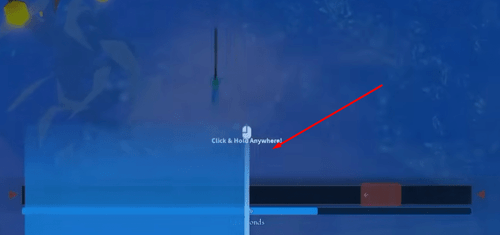
How to Get the Poseidon's Lance Rod
You must have a 100% Bestiary for this layer before you can buy the rod.
During a Storm Flood event, a set of four pillars near the corners of the layer will activate, as seen by their glowing runes. Stand on top of each pillar and hold either an Atlantean or King's Blessing fish.
Offer a fish to each of the four pillars to open a secret location in this layer.
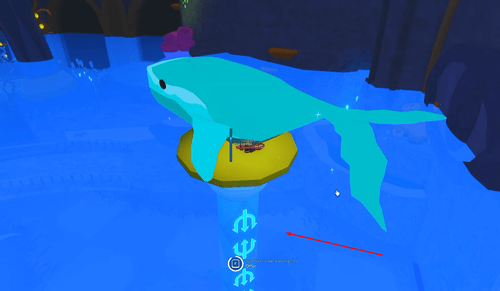
In the northern part of the layer, you'll find the Poseidon's Lance in a secret room that will remain open for two minutes after you make an offering to each pillar.
You can buy it for 13,000,000 C$.
Layer 4 - Zeus's Thunder of Chaos
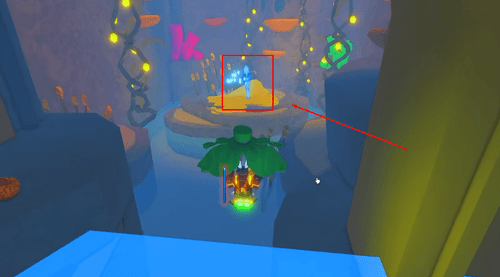
First, while focusing on Bestiary completion, you'll want to fish at a pool of water with yellow sparks of electricity. Catching a fish in such pools will give you the Electrified debuff.
You can regain the debuff by simply fishing at an electrified pool again, and you'll be doing it a lot to complete this layer.
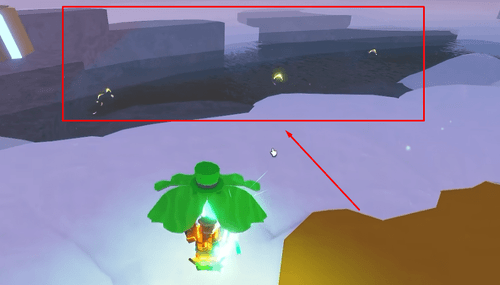
While you have the debuff on you, touching various objects in this relatively small layer will activate them. Before you proceed further, it's advised to activate the two lightning rods beside the grated pool of water.
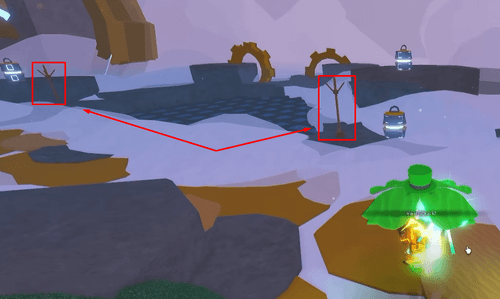
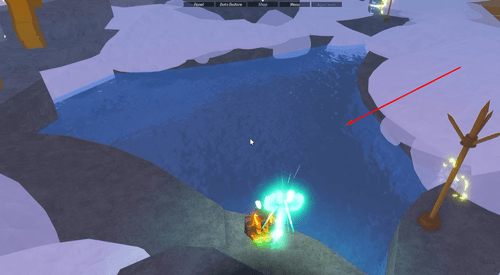
Powering up the lightning rods will open the grate, allowing you to catch some of the other unique fish in this layer. Keep it open until you can finish most of the Bestiary (the Hunt fish is done separately).
The Kerauno Wyrm
To spawn the Kerauno Wyrm, you can simply spawn it naturally by fishing in the layer with high disturbance. Similar to the other Hunt fish so far, you'll have to dodge balls of electricity as you reel in the fish.
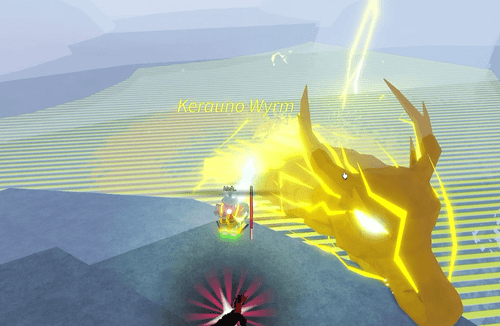
Upon catching the Kerauno Wyrm, you'll begin the minigame to break the seal. This time, you have a shorter 45-second timer, but the lightning will aggressively strike down at your bar as you try to survive.
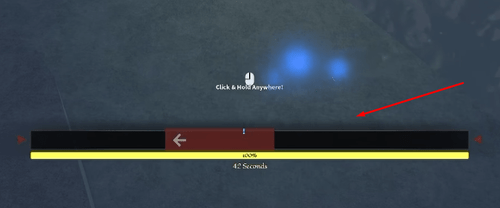
Once you manage to beat the minigame, you'll get another cutscene showing the seal breaking open.
How to Get the Zeus's Thundermaul Rod
You must have a 100% Bestiary for this layer before you can buy the rod.
Once you've completed the Bestiary for Zeus's Thunder of Chaos, you can go and buy the special rod for this layer. To do so, you'll need to activate all of the batteries and golden gears (the ones without blue lines) by touching them while Electrified.
Fish at an electrified pool of water and run towards either a battery or a gear to activate them, then quickly do the same with the others before they deactivate once more.
Touching them will consume the debuff, but there may be times when you can activate more than one in a single go if they're close enough.
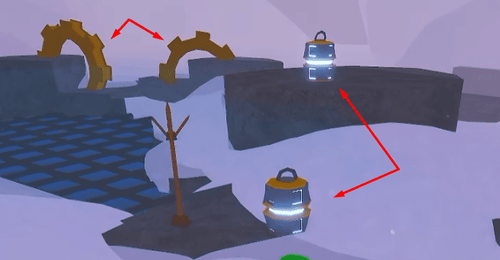
Once all of them are active, you can pull the lever at the east to open the large gate that will lead you to the Thundermaul. Proceed through the gate and run up the spiral steps.
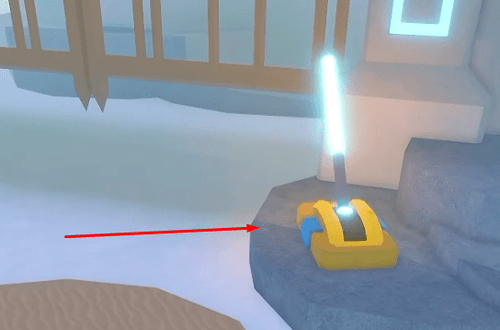
At the top, you'll find Zeus's Thundermaul, which you can buy for 18,750,000 C$.
Layer 5 - Hades' Underworld of Indefinite
For this layer, we have a unique currency called Wisps and Dark Wisps. Technically, you can get Wisps by fishing anywhere in the layer, while Dark Wisps are gathered from Soul Pools.
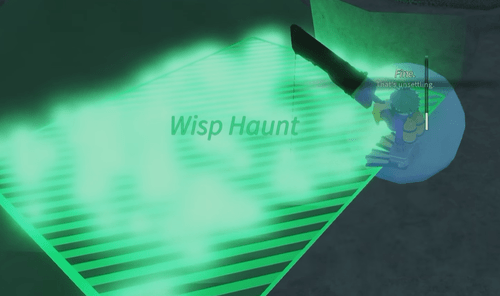
Randomly occurring Wisp Haunt events have an increased chance of dropping both wisps. It's recommended to use a Glitch Potion when farming these.
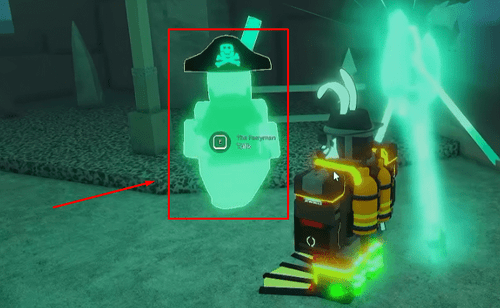
You can easily find Soul Pools by giving the Ferryman NPC 3 Wisps. This will grant you a 10-minute buff that reveals the location of the moving Soul Pool.
You can spawn a Soul Pool by offering wisps at all of the tombstones found throughout the layer. Otherwise, you can simply wait for them to spawn naturally.
If nobody else is farming this layer, you will have to keep offering wisps to the tombstones yourself in order to spawn Soul Pools.
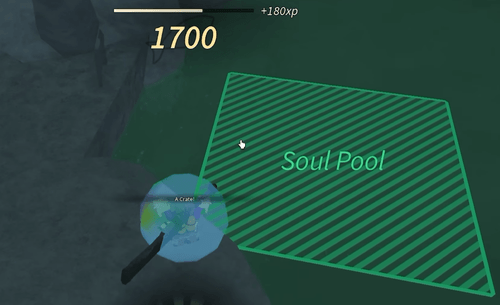
Keep fishing at Soul Pools until you see a message saying: "Soul Scourge! The dark spirits surge... control fades..."
The Styx Angler Hunt
During a Soul Scourge, you have a small chance of spawning the Styx Angler, which is this layer's Hunt fish. While the Soul Scourge event is active, keep fishing at Soul Pools.
Eventually, a Styx Angler should spawn in the water. If the event ends before it shows up, you'll have to start another Soul Scourge and try again.
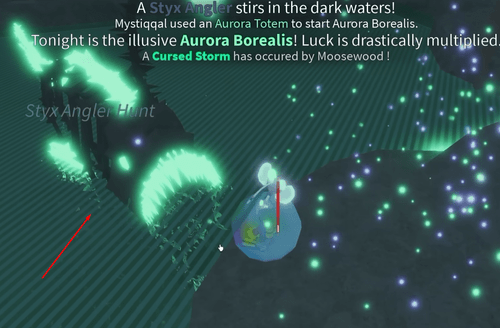
Similar to the other boss fights, dodge whatever the game throws at you while trying your best to reel in the Styx Angler. In this case, you'll have to contend with large purple beams and wisps that will mess with your progress.
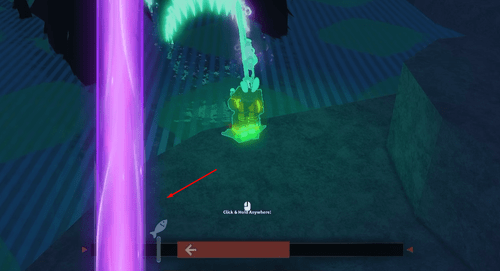
Once you've caught the Styx Angler, you'll then start the minigame to break the seal for this layer.
You'll have to survive a whole minute while dodging the same hazards from the Styx Angler minigame, but also keep in mind that your bar will change sizes throughout.
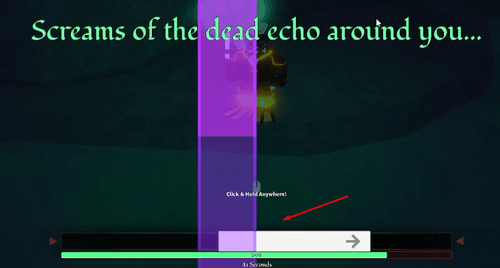
Afterwards, the seal blocking the final layer will open after a brief cutscene. Make sure to get the rod from this layer first though!
How to Get the Hades' Soul-Scythe Rod
You must have a 100% Bestiary for this layer before you can buy the rod.
Before you can get the Hades' Soul-Scythe, you'll need a total of the following resources:
- 125 Wisps
- 25 Dark Wisps
Once you have all of that, proceed to the west of the layer. There, you'll find a gate guarded by two colored statues.
Pay the red statue 100 Wisps and then offer your 25 Dark Wisps to the green statue. This will open the gate that they're guarding between them.
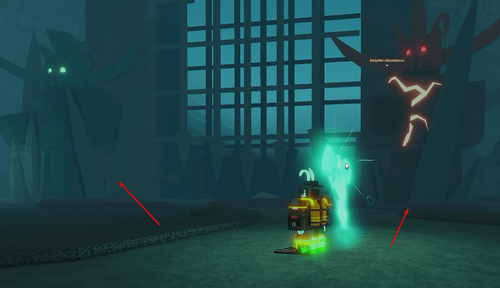
Before you enter, speak to the Spirit Guide sitting to the left of the red statue. They will offer to sell you a Styx Lantern for 25 Wisps. Buy and equip the Styx Lantern.
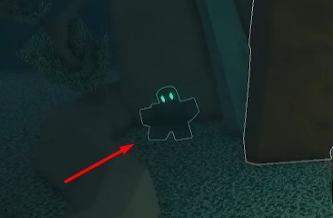
Once you have the Styx Lantern equipped, enter through the gate that you just opened. This is a dark maze that you normally wouldn't be able to navigate without the lantern.
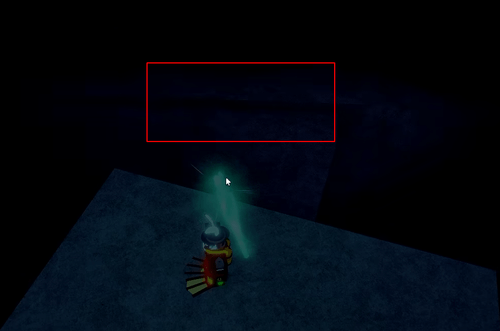
Simply find the exit and be careful not to fall off the edges. There is no timer for completing this maze, so feel free to go slow. Eventually, you'll find a ledge that you can glide onto from one of the edges to the west:
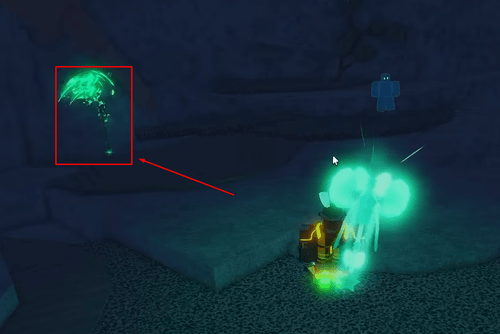
Once you make it through, you'll find yourself in a small space where you can buy the Hades' Soul-Scythe for 25,000,000 C$.
Final Layer - Olympian Fissure
Once you reach the Olympian Fissure, you're now at the final stretch. Before you can find the Olympian Godbreaker, you first need to meet the following conditions:
- Complete Bestiary for ALL 6 layers.
- Have all of the layers' unique rods
- 50,000,000 C$ ready to buy the Olympian Godbreaker
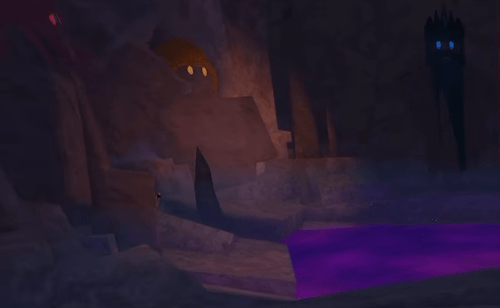
With the requirements ready, inspect the statues within the Olympian Fissure. You should see 5 statues overlooking the pool in the middle.
These statues correspond to each layer of the Wrath of Olympus, and their eyes will not be glowing until they are manually triggered.
There's a chance that you join a server where some of these are already glowing. If that's the case, you can skip their corresponding layer in the next step.
Activating the Statues
To trigger the statues, you'll have to fish in each layer using their respective rods. You must do this until you see a special announcement on your screen, which will appear in this order assuming you're starting from scratch:
Layer | Corresponding Rod | Glowing Eyes | Announcement |
|---|---|---|---|
Bellona's Frenzy of War | Bellona's Waraxe | Red | An ancient presence stirs... |
Apollo's Song of Light | Apollo's Sunshot | Orange | The fabric of reality shifts... |
Poseidon's Storm of Floods | Poseidon's Lance | Blue | The gods' gazes pierce your being... |
Zeus's Thunder of Chaos | Zeus's Thundermaul | Yellow | Divine spirits converge in the depths... |
Hades' Underworld of Indefinite | Hades' Soul-Scythe | Green | The Olympian Devil has been summoned! |
The announcements aren't necessarily tied to the layer, but they will be in the order above if you go through the layers in order. E.g. the last statue you activate will always show the Olympian Devil announcement.
Once you see the announcement that the Olympian Devil has been summoned, return to the Olympian Fissure and try your luck at catching that Secret fish.
It's a difficult Hunt fish that makes use of all the mechanics from the bosses in every layer, so be ready for a struggle.
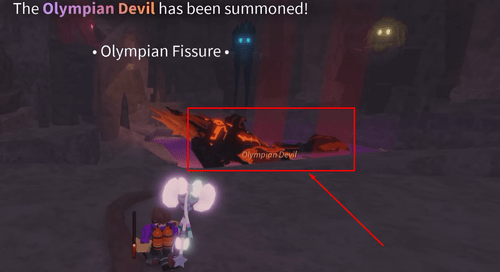
Once you manage to catch the Olympian Devil and you have all of the Bestiaries for the Wrath of Olympus cleared, jump into the portal that spawns on the pool after the water drains:
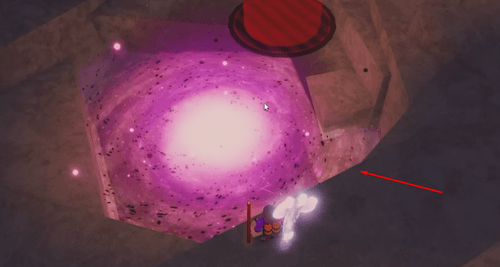
You'll instantly be taken to the location where you can buy the Olympian Godbreaker, which will set you back 50,000,000 C$. Congratulations, you now have one of the best rods in the game!